In today’s digital age, video content is more important than ever, whether for personal projects, professional endeavors, or social media presence. OpenShot Video Editor is a powerful, open-source tool that offers a comprehensive suite of features to help you create stunning videos with ease.
Whether you’re a beginner looking to make simple edits or an experienced editor seeking advanced functionalities, OpenShot provides an intuitive interface and robust capabilities to meet your needs.
In this blog, we’ll guide you through the essentials of using OpenShot Video Editor, from importing your media to exporting your final masterpiece. Let’s dive in and discover how you can turn your video ideas into reality with OpenShot.
Steps to Edit Video in Video Editor
Look at all the steps you need to follow to edit your video in OpenShot video editing software:
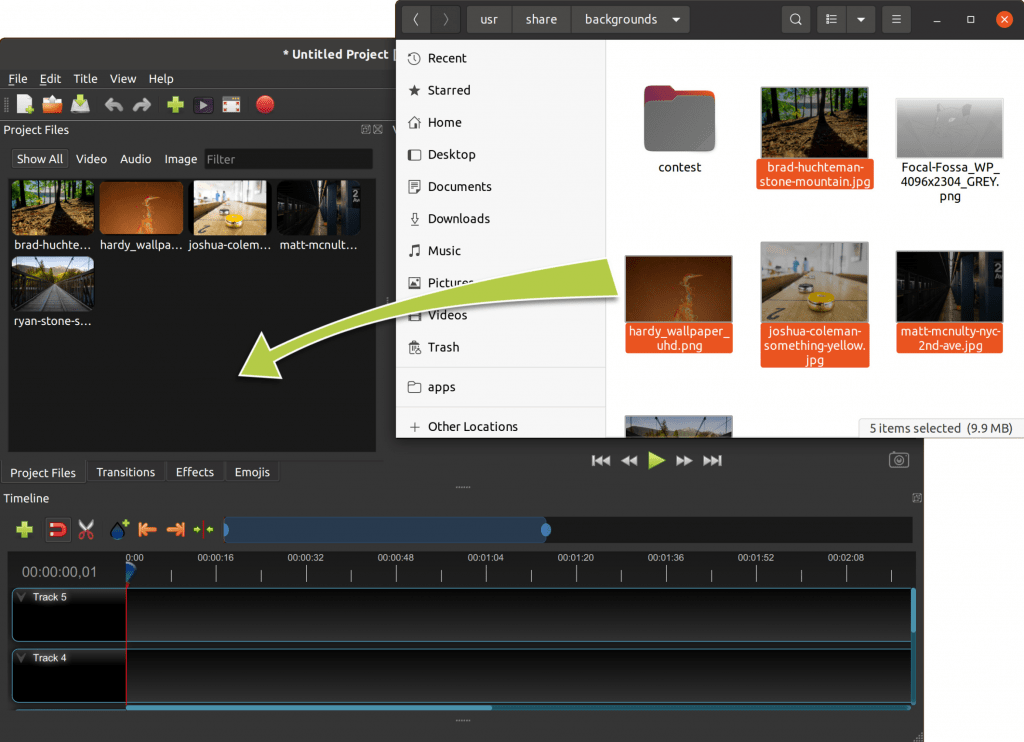
Step 1: Adding Photos and Music
Before you start creating videos, you need to import media into OpenShot. You can also use the files from your desktop into this video editor. Moreover, you can also select filters like “Video”, “Audio”, and “Image” to add particular file type.
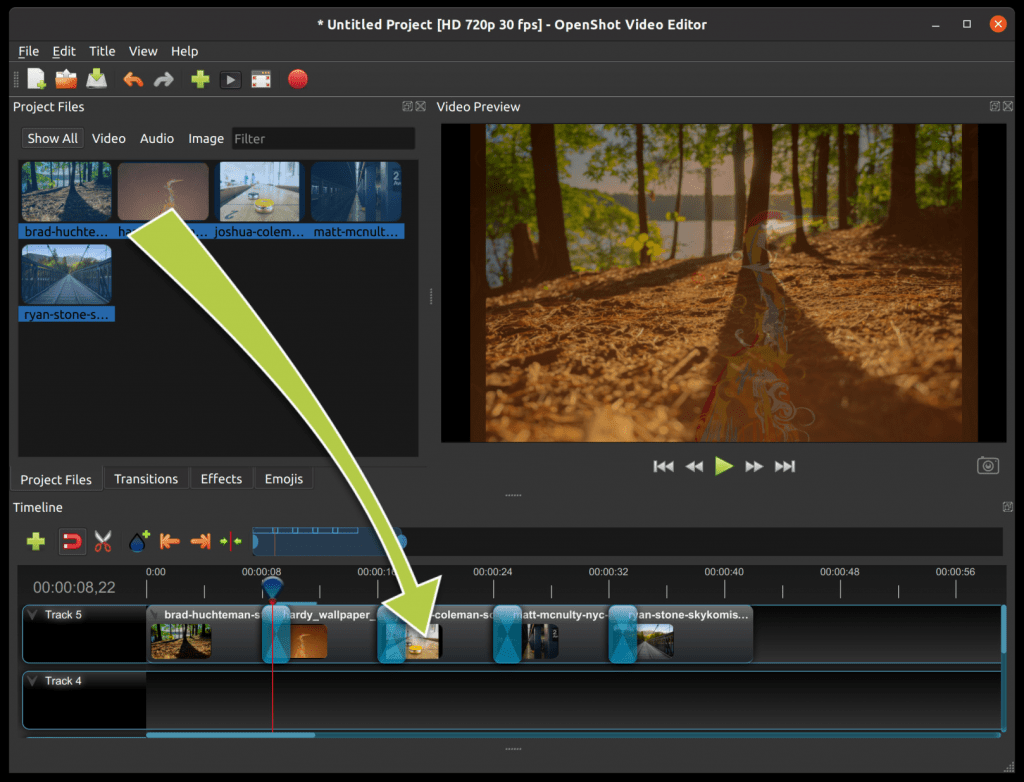
Step 2: Inserting Photos in Timeline
Next, place each video or photo onto a track in the timeline (as shown in the illustration). The timeline represents your final video, so arrange your photos (clips) in the order you want them to appear.
If you overlap two clips, OpenShot will automatically create a smooth transition between them (affecting only the image, not the audio), indicated by blue rounded rectangles between the clips. Remember, you can rearrange the clips as needed by dragging and dropping them.
Additionally, you can adjust the duration of each clip by clicking and dragging the left or right edge with your mouse.
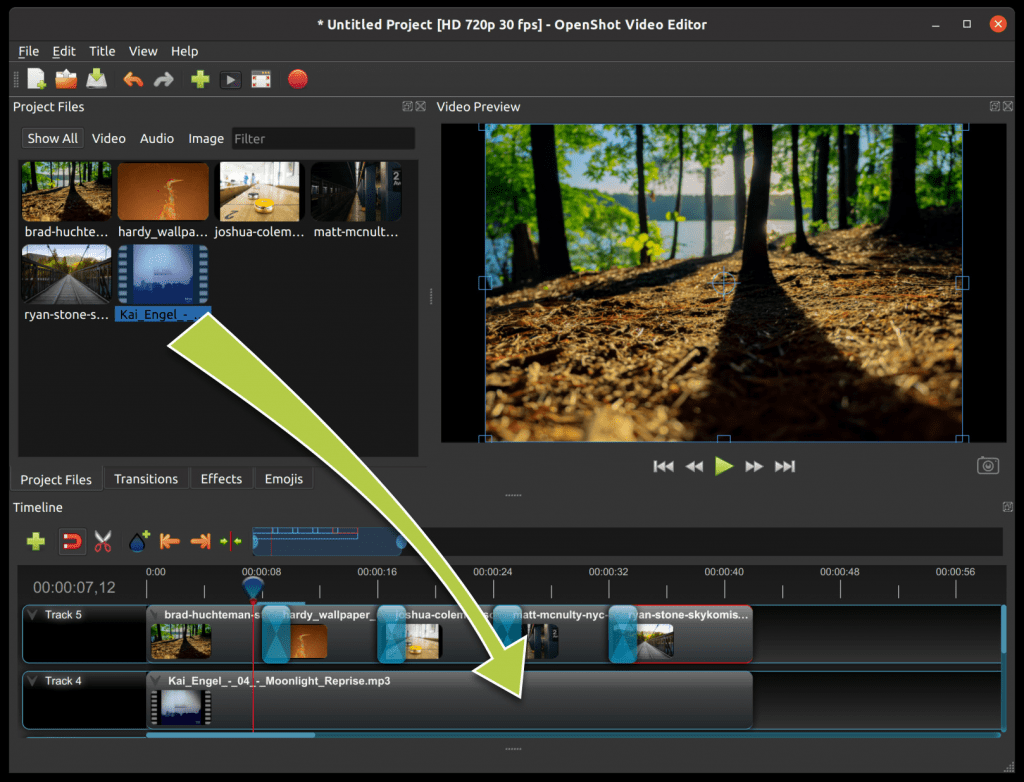
Step 3: Insert Music to the Timeline
For making your videos more interesting, you can also add music in it. For that, select the file that you imported in the first step and drag into the timeline. If the soundtrack is too long then you can resize it to use it in your timeline.
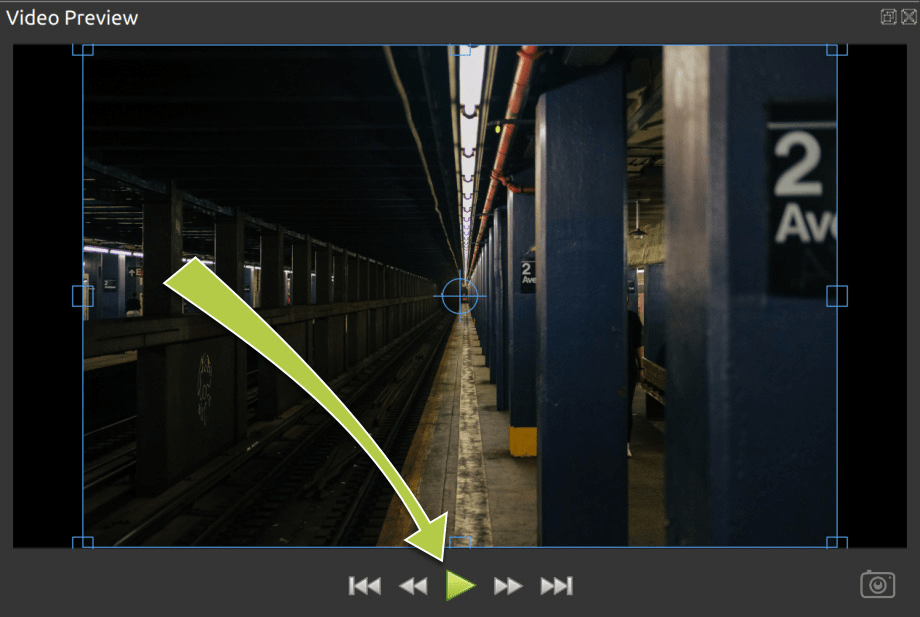
Step 4: Preview the Project
To preview your video, click the Play button below the preview window. You can also pause, rewind, and fast-forward your video project using the corresponding buttons.
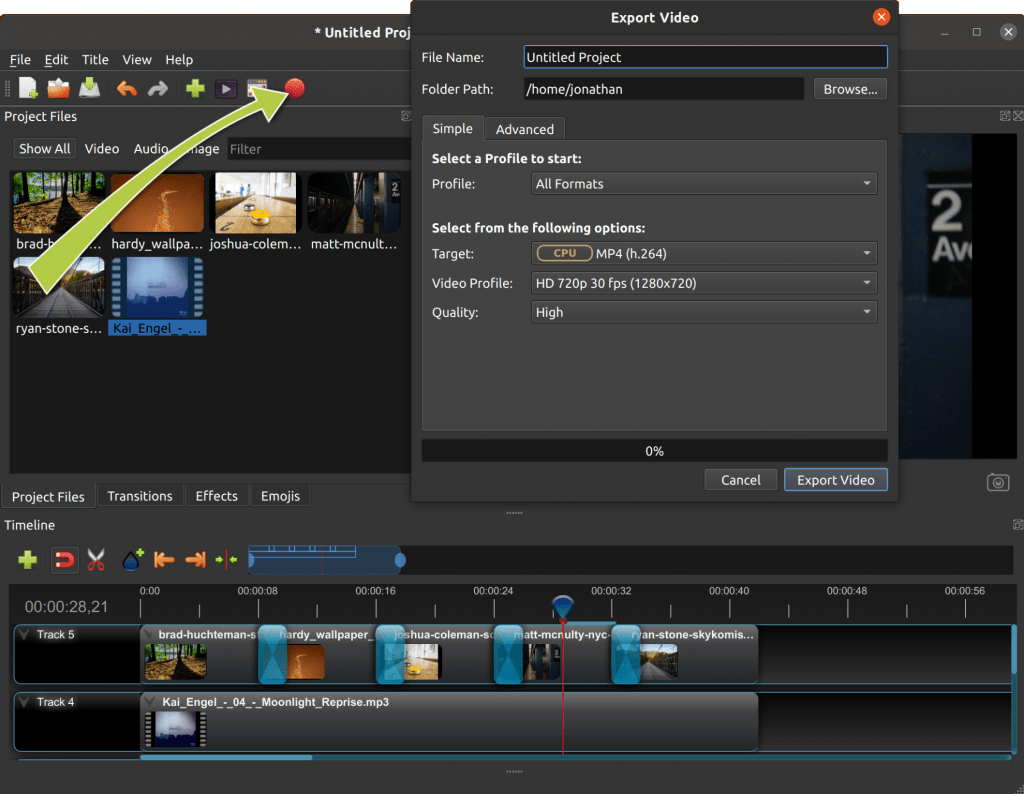
Step 5: Export Your Video
Once you are done with the video editing, you are ready to export your project. When you export the video, it gets converted into a single video output file. This video will work on major media players such as VLC, websites, YouTube, etc.
Click the Export Video icon at the top of the screen (or go to File → Export Video). The default settings are suitable, so simply click the Export Video button to render your new video.
How to Use Property Panel in Openshot Video Editor?
OpenShot features a properties panel that lets you adjust various attributes of your media files. To access the properties panel, go to the top menu bar, select “View,” then highlight “Views,” and choose “Advanced View.” Alternatively, you can right-click on a file and select “File Properties.”
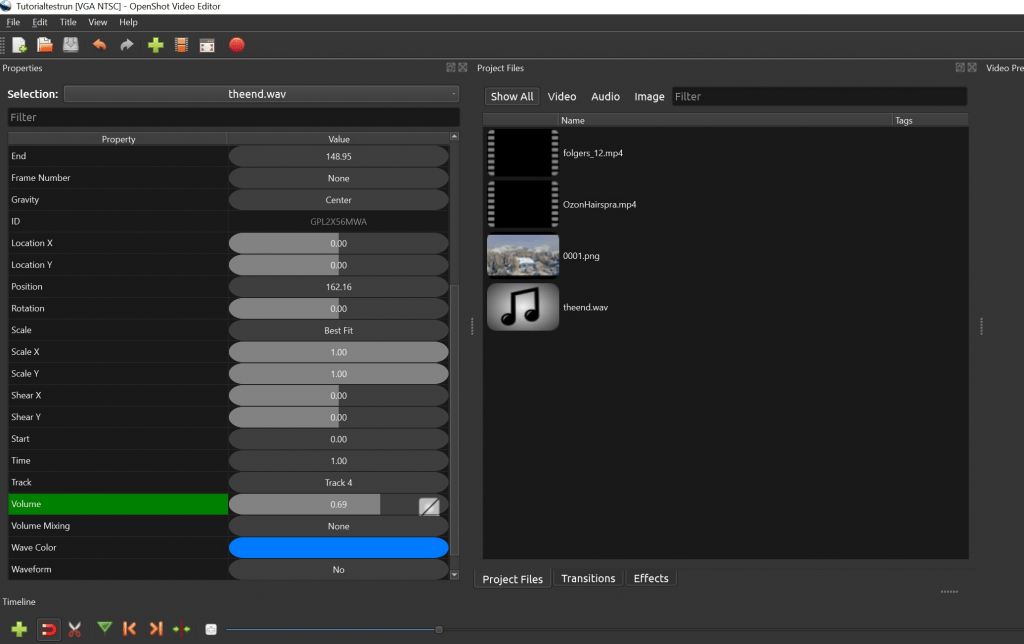
The properties panel is where you can fine-tune your clips, transitions, and effects. Be sure to select the clip you want to edit before making any adjustments. The selection menu at the top of the properties panel displays the currently selected clip and allows you to choose another clip if needed.
Some Important Elements of Timeline Layout in OpenShot
There are multiple elements in the video timeline that you can use in OpenShot video editing software. Lets look at them and see how can we use them.
- Video Files
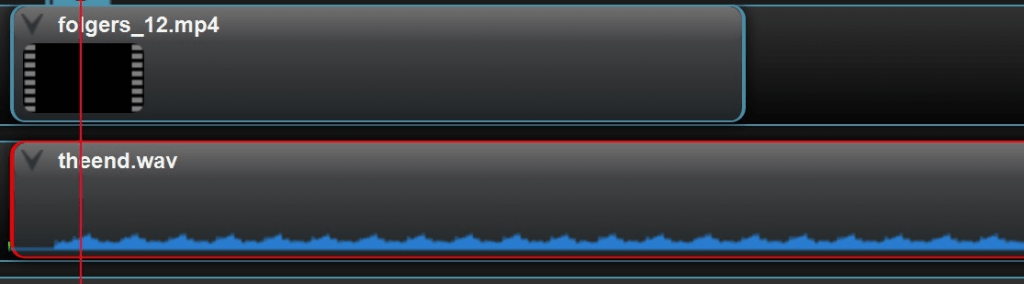
These files are marked by the content’s thumbnail. Video files will come with a film reel over the thumbnail whereas images will not have. The video files could be added to their own audio within the video or these may be silent video clips.
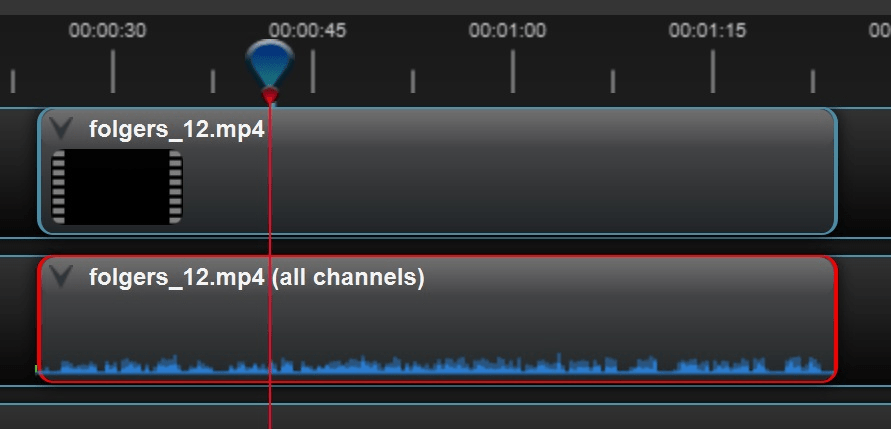
This illustration shows the difference between a video clip with sound and one without.
There are two ways to view the sound waveforms for video clips. The first method is to change the display settings by right-clicking the video file, then selecting Display > Show Waveform.
The second method is to separate the audio by right-clicking the video file, then choosing Separate Audio > Single or Multiple Clips.
- Audio Files
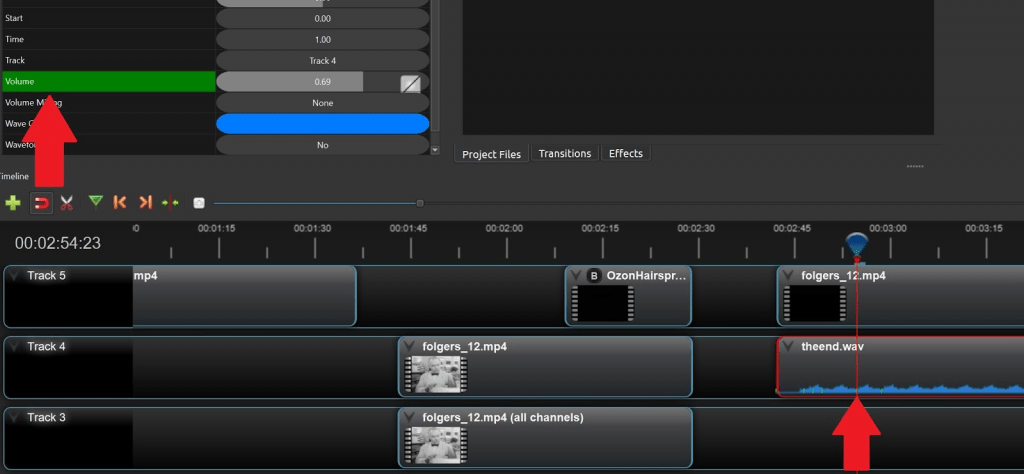
Audio files are usually represented as a musical note as a thumbnail or if the file includes an album cover in the metadata it will display that. You can see the waveform representation of the audio by right clicking the file on the timeline and selecting Display>Show Waveform.
The waveform marks the frequency and volume of the audio in the clip. These audio files can be easily layered, to have several layers of sound happening all at once. You can adjust the volume controls by right clicking on the media file>Volume
- Keyframes
Keyframes are depicted by the little green marks within the media files in the timeline. With it, you can easily highlight the attributes you are working on within the property panel.
Keyframes also let you control different parts of your media. You can rotate a picture, perform manual dissolve, and also work on the different video effects available.
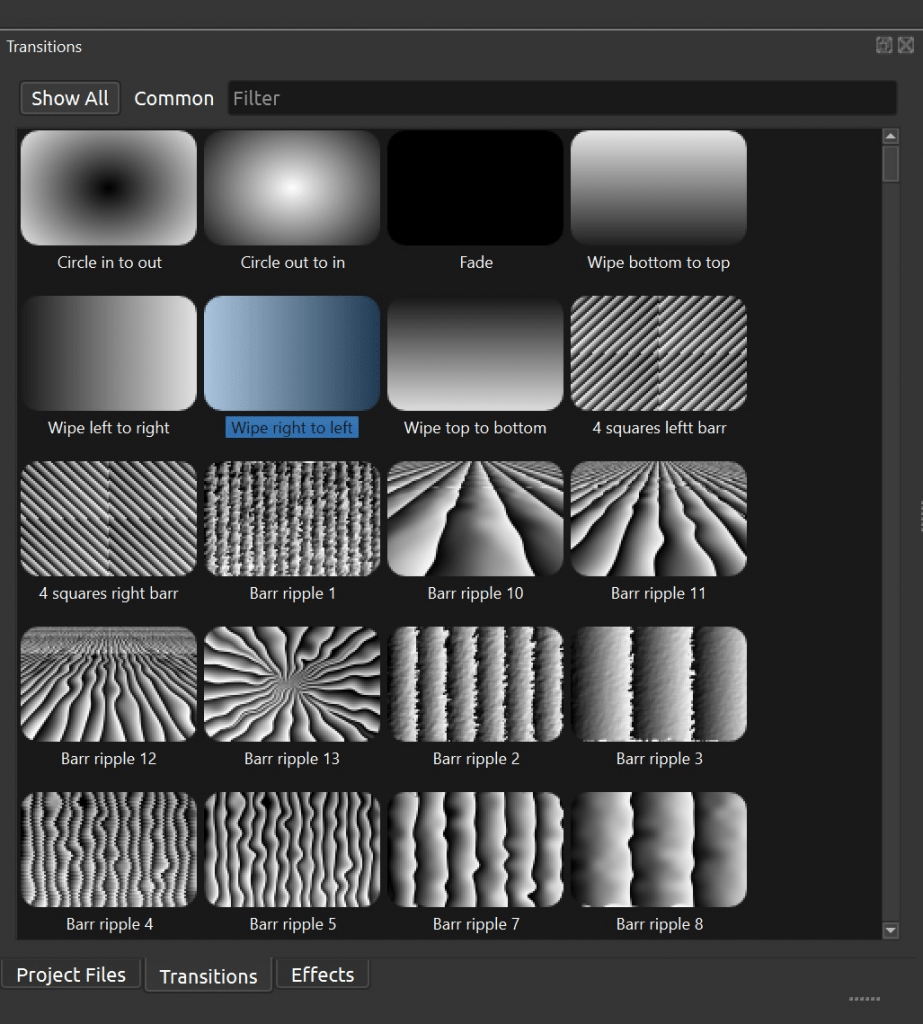
- Video Transitions:
These transitions are shown by the blue rounded rectangles over the video timeline. In OpenShot you get different types of transitions effects that you can incorporate in the video project. To add any transition, click left and drag the transition to the required video.
Furthermore, you can also choose a video clip and drag it into another clip to create a dissolving effect in between these clips.
- Text
You can add text to your OpenShot project by using the Title option.
To open the title customization menu, select the Title menu from the top or press Control + T (Windows).
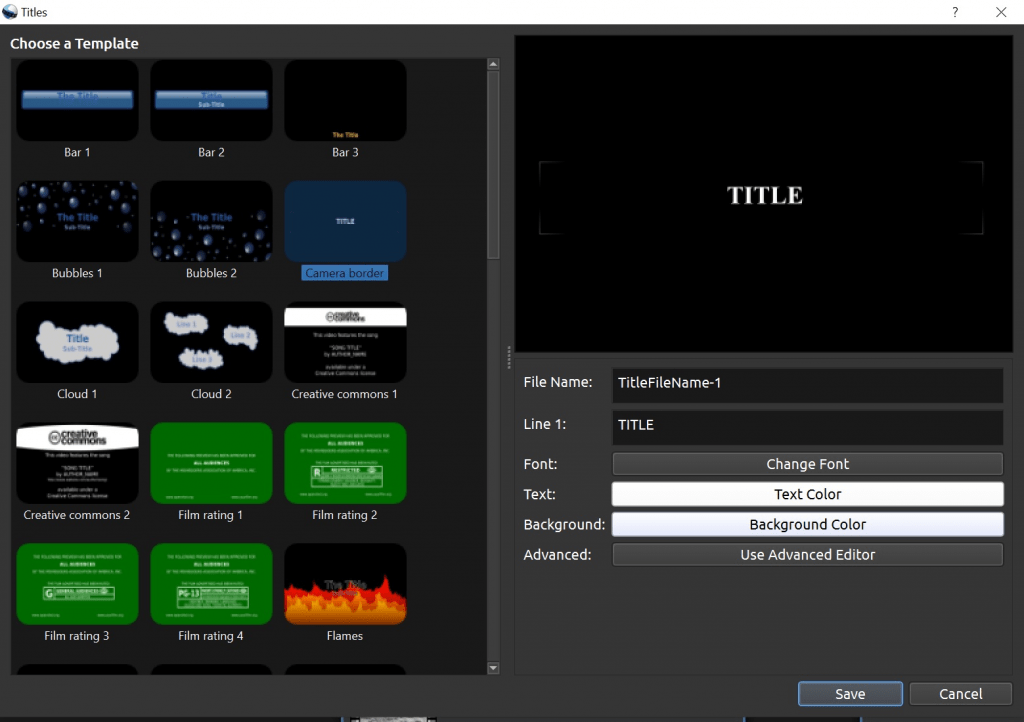
This will open the Titles window panel.
In this panel, you can customize your title with various options, such as choosing the font type, color, and background color.
This is also where you type your title or text in the “Line 1” field.
Your newly created title can be added as an overlay on an existing video or placed in an empty slot on the timeline. This is useful for adding text as captions or labels to the on-screen action or creating a title screen.
Simply drag the newly created title from the project files panel onto your timeline.
Start Editing Today!
Mastering OpenShot Video Editor can enhance your video editing experience, enabling you to produce professional-quality content with minimal effort. By following this guide, you’ve learned how to navigate the interface, import and arrange your media, apply effects and transitions, and finally, export your project. Whether you’re editing videos for work, school, or personal enjoyment, OpenShot’s versatile tools and user-friendly design make it an ideal choice.

Written by
Varsha ![]()
Varsha is an experienced content writer at Techjockey. She has been writing since 2021 and has covered several industries in her writing like fashion, technology, automobile, interior design, etc. Over the span of 1 year, she has written 100+ blogs focusing on security, finance, accounts, inventory, human resources,... Read more