Creating engaging videos is easier than ever with the right tools, and VSDC Video Editor is one of the best free options available. Whether you’re a beginner or have some experience, this guide will walk you through the basics and advanced features of VSDC to help you produce professional-quality videos.
Downloading and Installing VSDC
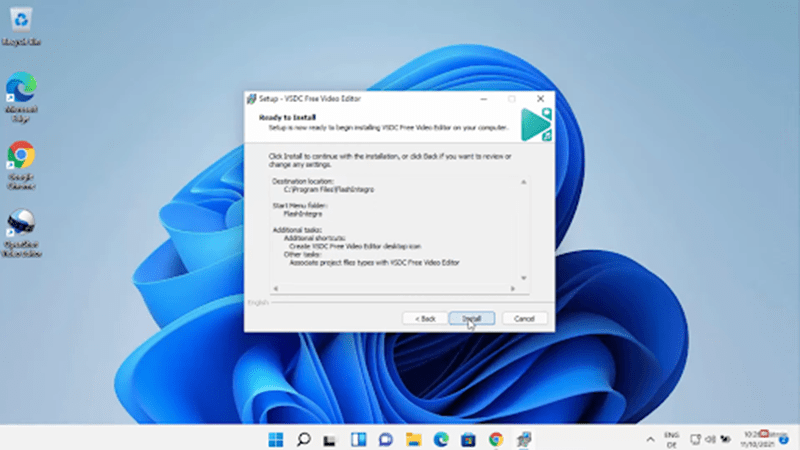
- Visit the Official Website: Go to videosoftdev.com for the VSDC Free Video Editor download link.
- Download the Installer: Click on the download button to start downloading the installer file.
- Run the Installer: Open the installer file once the download is complete.
- Follow Installation Steps: Agree to the terms and conditions, choose your installation folder, and click ‘Install’.
- Launch VSDC: Open VSDC to start your video editing journey after installation.
Navigating the VSDC Editing Interface
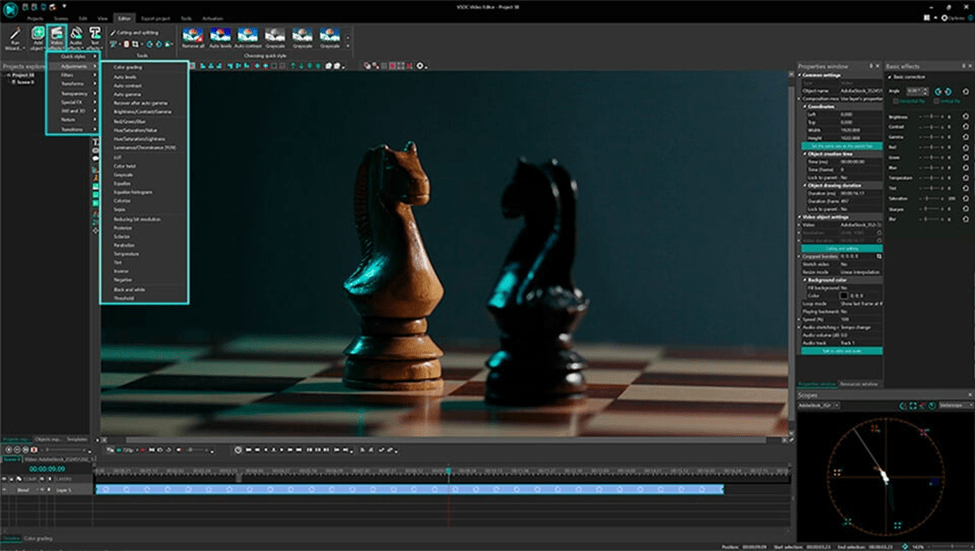
- Menu Bar: Located at the top, it contains options like ‘File,’ ‘Edit,’ ‘View,’ etc., for various commands.
- Toolbar: Below the menu bar, it offers quick access to common tools such as cut, copy, paste, and other editing features.
- Project Timeline: Found at the bottom, this is where you’ll arrange your video clips, audio tracks, and effects.
- Preview Window: On the right, it shows a real-time preview of your project as you edit.
- Left Panel: Features tabs like ‘Projects,’ ‘Scenes,’ and ‘Export,’ providing different functionalities and project management options.
How To Use VSDC Editor to Create a Project
- Launch VSDC Video Editor: Open the VSDC Video Editor from your desktop or start menu.
- Start a New Project: Click on ‘New Project’ on the start screen. Then, enter the project title and select the video resolution, and frame rate. Finally, click ‘Finish’ to create the project.
- Import Media Files: Click ‘Import Content’ to add your video, audio, and image files. Drag and drop them into the timeline.
- Organize Your Media: Arrange your clips in the desired order. Use the timeline to manage the sequence and duration of each clip.
- Save Your Project: Regularly save your project by clicking ‘File’ > ‘Save Project As’. Choose a location and name for your project file.
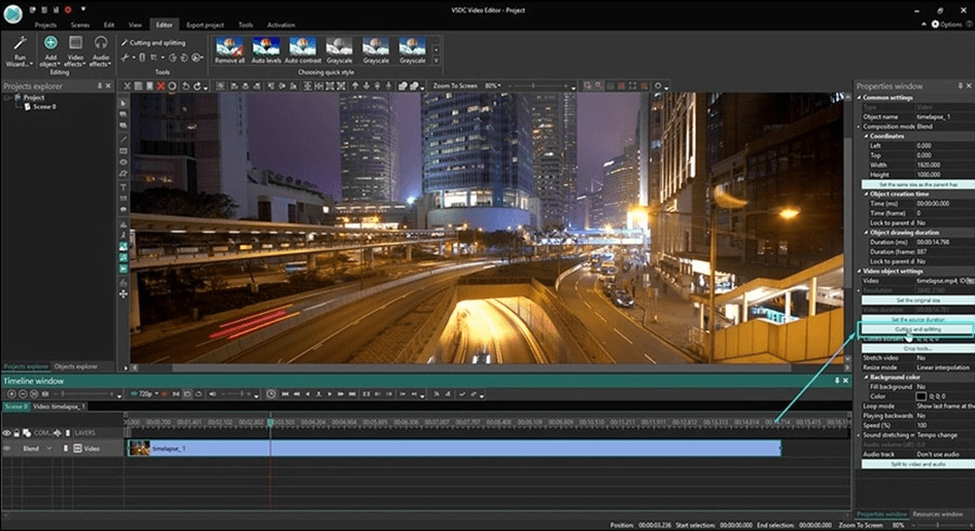
How to Import a Video to VSDC
- Open the Import Dialog: Click the ‘Import Content’ button.
- Drag and Drop: Alternatively, drag your video, audio, and image files directly into the project timeline.
- Supported Formats: VSDC supports various formats, making working with different media types easy.
- Organize Media: Arrange your media files in the timeline as per your project requirements.
How to Cut Video Using VSDC
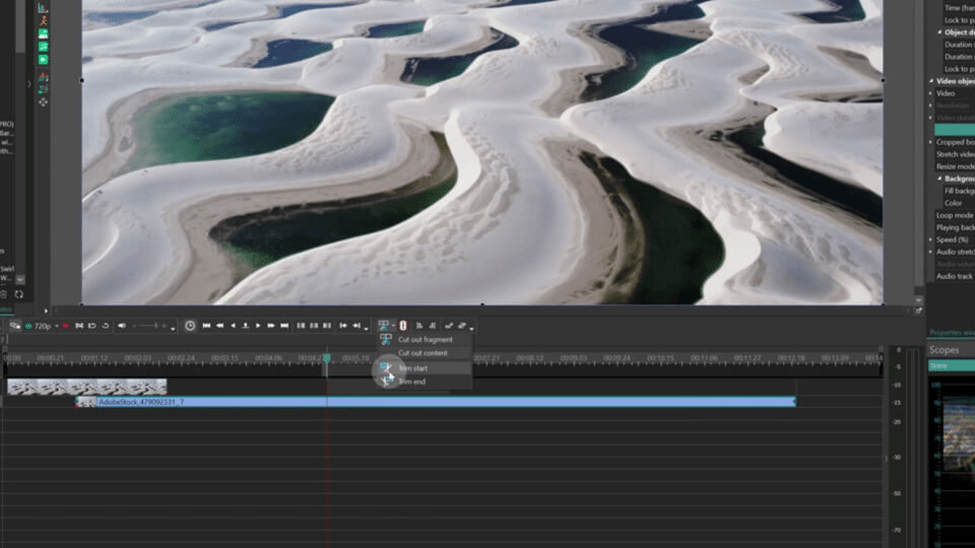
To cut or trim videos, you can follow the steps mentioned below. These include:
- Select the Clip: Click on the clip in the timeline that you want to cut or trim.
- Move the Playhead: Place the red playhead at the point where you want to make a cut.
- Use the Split Tool: Click on the ‘Split’ tool from the toolbar to cut the clip.
- Trim the Clip: Drag the edges of the clip to adjust its length, removing unwanted parts.
- Refine Edits: Ensure smooth transitions and precise cuts for a polished final video.
How to Split a Video Using VSDC
- Start VSDC Video Editor and create a new project. Click on ‘Import Content’ to add your video to the timeline.
- Click on the video clip in the timeline that you want to split.
- Drag the red playhead to the point where you want to split the video.
- Click on the ‘Split into parts’ button in the toolbar or press ‘Ctrl + K’.
- This will cut the video into two separate clips at the playhead position.
Cropping a Video Using VSDC
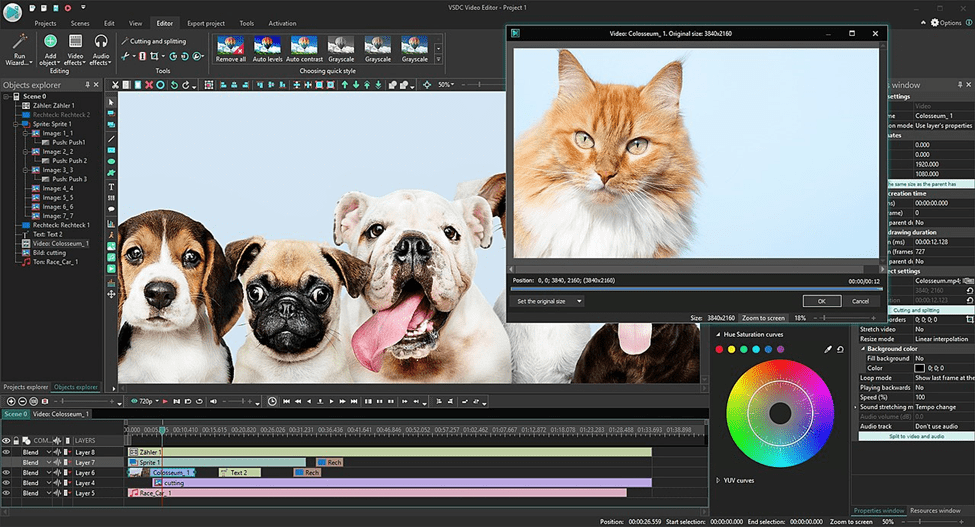
- Click on the video clip in the timeline that you want to crop.
- Go to the ‘Tools’ tab and select ‘Crop’ from the dropdown menu.
- A new window will open with cropping handles. Drag the handles to select the area you want to keep.
- Click ‘OK’ to apply the crop and return to the main editor.
How to Rotate a Video Using VSDC
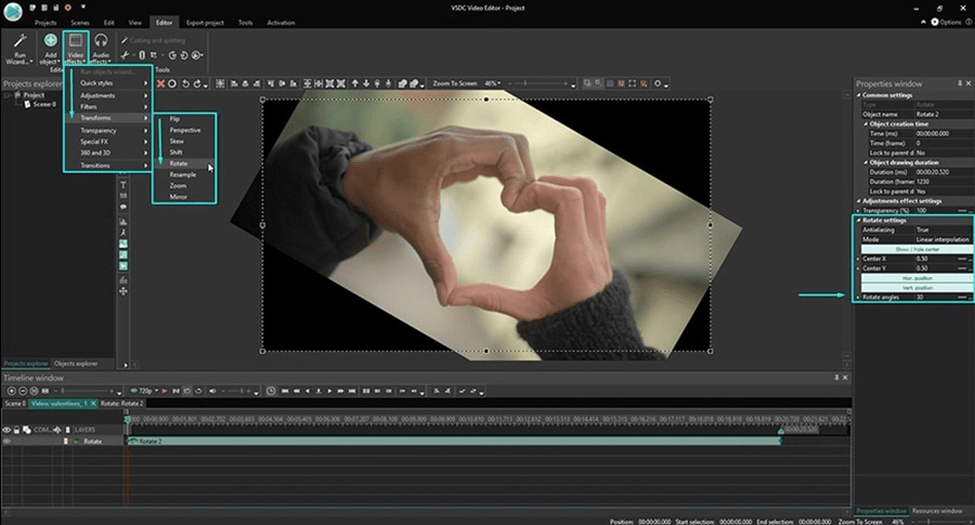
- Click on the video clip in the timeline that you want to rotate.
- Go to the ‘Video Effects’ tab, select ‘Transforms’, and then choose ‘Rotate’.
- In the properties window, set the angle of rotation (e.g., 90, 180 degrees).
- Adjust other settings as needed.
- Click ‘Apply’ to save the changes and see the rotated video in the preview window.
How to Remove Background Noise from a Video in VSDC
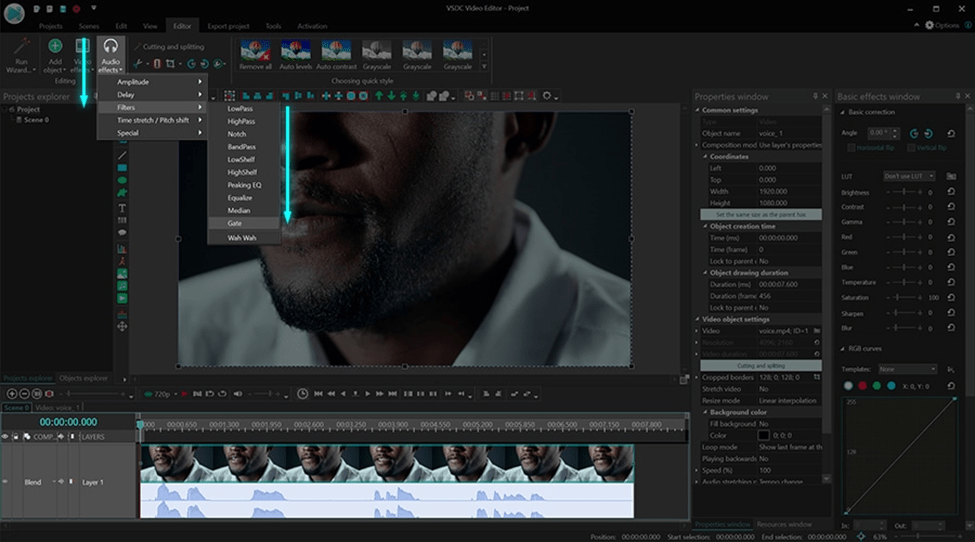
- Import Your Video: Start a new project in VSDC and import your video file.
- Select the Video Clip: Click on the video clip in the timeline to select it.
- Open Audio Properties: In the properties window on the right, look for the ‘Audio Track’ section.
- Mute the Audio: Find the ‘Audio volume’ setting and set it to 0%.
- Apply Changes: Confirm the changes by clicking anywhere outside the properties window. Your video will now play without sound.
How to Apply Effects and Transitions in VSDC
- Choose Transition: Click on the ‘Video Effects’ button in the toolbar, select ‘Transitions,’ and pick one.
- Apply Transition: Drag the transition effect onto the timeline between two clips.
- Adjust Duration: Modify the duration of the transition by dragging its edges.
- Preview Transitions: Use the preview window to see how the transitions look and make adjustments as needed.
How to Apply Effects and Filters in VSDC
- Select Clip: Click on the clip in the timeline that you want to enhance.
- Open Effects Menu: Click on ‘Video Effects’ in the toolbar to view available effects and filters.
- Choose Effect: Select an effect from categories like color correction, blur, and artistic effects.
- Adjust Settings: Modify the effect’s settings to fit your vision, such as intensity, color balance, and more.
- Apply Multiple Effects: Layer different effects to achieve a unique look.
How to Add Text to A Video or An Image in VSDC
- Select Text Tool: Click on the ‘Text’ tool in the toolbar.
- Place Text Box: Click on the preview window where you want the text to appear, creating a text box.
- Type Your Text: Enter your text in the text box.
- Customize Text: Adjust the font, size, color, and position to match your video’s style.
- Animate Text: Add animations to your text for dynamic titles and captions.
How To Export a Video in VSDC on Different Platforms
- Choose Platform Preset: Select presets for platforms like YouTube, Facebook, or Instagram.
- Customize Settings: Adjust the preset settings if needed to meet the platform’s specifications.
- Start Export: Click ‘Export Project’ to begin the export process.
- Save File: Choose a location to save your exported video file.
- Upload to Platform: Once exported, upload your video to the desired platform following its guidelines.
Using Masks and Blending Modes in VSDC
- Select Clip: Click on the clip where you want to apply masks or blending modes.
- Add Mask: Go to ‘Video Effects,’ choose ‘Transforms,’ and select a mask type.
- Adjust Mask: Resize and position the mask to hide or reveal parts of the clip.
- Blending Modes: Select blending modes from the ‘Blending Modes’ option to control how clips interact.
- Experiment: Combine masks and blending modes for unique visual effects.
Working with Keyframes in VSDC
- Select Clip: Click on the clip in the timeline where you want to add keyframes.
- Open Properties Window: Click on the ‘Properties Window’ to access keyframe settings.
- Add Keyframe: Use the ‘Add Keyframe’ button to set keyframes at different points in the clip.
- Animate Properties: Control properties like position, scale, and opacity over time.
- Smooth Transitions: Create smooth transitions and animations by adjusting keyframes.
How To Edit Video Using VSDC
- Import Your Video: Start a new project and import your video file into the timeline.
- Cut and Trim Clips: Use the split tool to cut your video into smaller segments. Trim the clips by dragging their edges to remove unwanted parts.
- Add Transitions: Go to the ‘Video Effects’ tab, select ‘Transitions’, and choose a transition. Drag the transition effect between clips in the timeline.
- Apply Video Effects: Select a clip and click on ‘Video Effects’ to add filters, color correction, or other effects.
- Add Text and Titles: Use the ‘Text’ tool to add titles, captions, or subtitles to your video. Customize the font, size, and color.
- Adjust Audio Levels: Click on the audio track and use the properties window to adjust the volume and add effects.
How To Add B-Roll In VSDC
- Start a new project and import both your main video and B-roll clips.
- Drag your main video to the timeline.
- Place B-roll clips on a track above the main footage.
- Position them where you want the B-roll to appear over the main video.
- Use the timeline to align the B-roll clips with the main footage.
- Trim and adjust the duration of B-roll clips as needed.
- Use transitions between B-roll and main footage for a smooth blend.
How To Add Music In VSDC
- Import Audio Files: Drag your music or voiceover files into the timeline, just like video files.
- Position Audio: Place the audio files in the appropriate spots in the timeline.
- Adjust Volume: Use the audio settings to control the volume levels and balance.
- Fade In/Out: Apply fade-in and fade-out effects to smooth audio transitions.
- Sync Audio: Ensure that the audio is synced correctly with the video for a cohesive experience.
How To Adjust Audio Levels In VSDC
- Start a new project and import your video and any separate audio files.
- Click on the audio track in the timeline to select it.
- In the properties window, you will find the ‘Audio Track’ section.
- Set the ‘Audio volume’ to your desired level (increase or decrease).
- You can also add fade-in/out effects from the audio effects menu.
- Play your video to preview the audio levels and make further adjustments if needed.
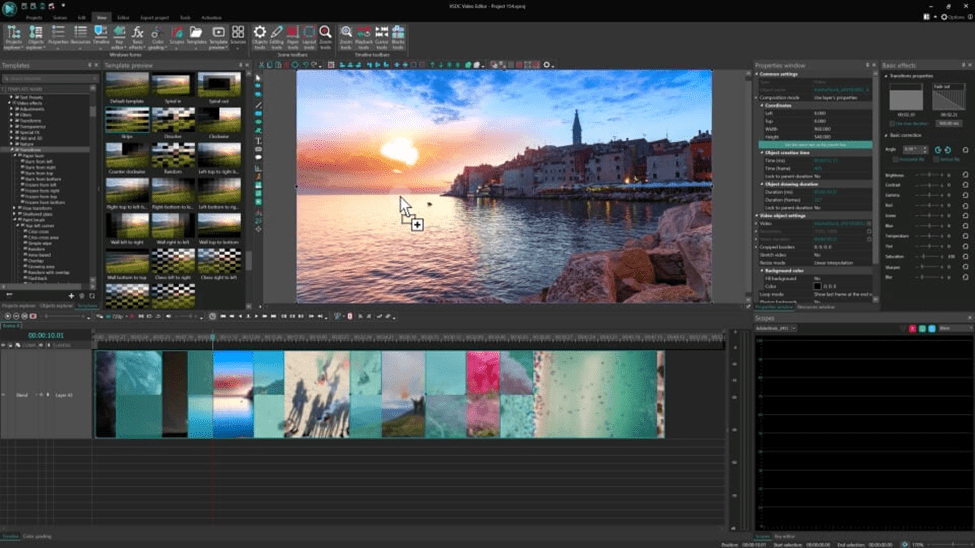
How To Color Grade In VSDC
- Open Color Correction: Select your clip and click on ‘Video Effects’ in the toolbar, then choose ‘Adjustments’.
- Adjust Brightness: Modify the brightness to make your video lighter or darker.
- Control Contrast: Enhance the contrast to make the colors pop.
- Saturation: Adjust the saturation to make colors more vibrant or muted.
- Color Grading: Apply color grading presets to create a specific mood or style for your video.
How To Use VSDC Free Video Editor to Export Your Project
Choosing the Right Export Settings
- Open Export Tab: Click on the ‘Export Project’ tab in the left panel.
- Select Format: Choose the appropriate format, such as MP4 for online videos or AVI for high-quality files.
- Adjust Settings: Modify resolution, bitrate, and other settings based on your needs.
- Preview Output: Use the preview feature to check how your video will look after export.
How to Use Green Screen In VSDC
- Start a new project and import both your main video and the green screen footage.
- Drag your main video to the timeline.
- Place the green screen footage on a track above the main video.
- Select the green screen clip, go to ‘Video Effects’ > ‘Transparency’ > ‘Background Remover’.
- In the properties window, adjust the ‘Tolerance’ and ‘Feather’ settings to remove the green background.
- Adjust the position and size of the green screen clip to fit the main video.
How to Use VSDC Screen Recorder
- Launch VSDC and go to ‘Tools’ > ‘Screen Capture’.
- Choose whether to record the full screen or a selected area.
- Drag the frame to adjust the capture area if selecting a specific part.
- Choose the video format, frame rate, and quality.
- Select the audio source (microphone or system audio).
- Click the ‘Start Recording’ button to begin capturing your screen.
- Use the stop button in the control panel to end the recording.
- Save the recorded file and import it into VSDC for further editing.
How to Blur Using VSDC
- Start a new project and import your video file.
- Click on the video clip in the timeline that you want to blur.
- Go to ‘Video Effects’ > ‘Filters’ > ‘Blur’.
- In the properties window, adjust the blur intensity and area.
- Use masks to apply blur to specific parts of the video if needed.
- Preview the video to see the blur effect and make adjustments as necessary.
How to Change Background Using VSDC
- Start a new project and import both your main footage and the new background.
- Drag your main video to the timeline.
- Place the new background on a track below the main video.
- Select the main footage, go to ‘Video Effects’ > ‘Transparency’ > ‘Background Remover’.
- Adjust the ‘Tolerance’ and ‘Feather’ settings to remove the original background.
- Adjust the position and size of the main footage to fit seamlessly with the new background.
Conclusion
VSDC Video Editor is a powerful tool that offers a wide range of features for both beginners and advanced users. By following this guide, you can learn the basics of video editing, explore advanced techniques, and create professional-quality videos. This is the way you can easily make professional videos in a speck of seconds without having any prior knowledge of video making.

Written by
Namrata Samal ![]()
Namrata is a skilled content writer with an expertise in writing marketing, tech, business-related topics, and more. She has been writing since 2021 and has written several write-ups. With her journey with Techjockey, she has worked on different genres of content like product descriptions, tech articles, alternate pages,... Read more