Summary: Leonardo AI can help you in creating stunning images, artworks, and prompts. Moreover, you can also generate images by using existing images. Let’s find out how you can perform these functions below.
There are many generative AI software solutions available in the market that can help you create visually appealing and photorealistic images easily. One such popular tool is Leonardo AI. With the help of Leonardo AI, you can easily generate stunning photorealistic images and artwork quickly.
All you must do is provide a text prompt, and the software will work instantly on creating images. In this article, you will learn how to use Leonardo AI to create beautiful artwork.
What is Leonardo AI?
Leonardo AI is a generative AI that can be used for creating artworks, images, and designs. While it is known for creating image assets for games, it can also be used for creating image assets for multiple industry types.
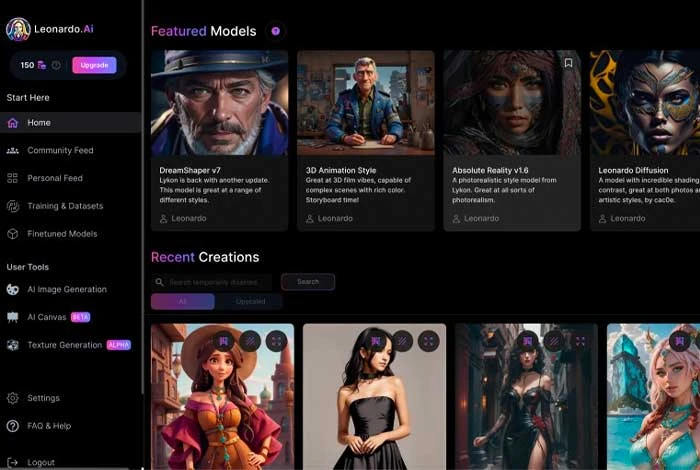
To create an image in Leonardo AI, you just need to add a text prompt and the image will be generated as per your requirement. Moreover, with its Canvas Editor, you can also add layers in your image and share the project details with other members in real time.
Easy Steps to Use Leonardo AI to Generate Images
For generating images, you need to sign up and add description in the prompt box. After the image is generated, you can adjust elements, change its style or modify it with a negative prompt. Here is a step-by-step tutorial to use this popular generative AI tool.
Step 1: Sign Up to Leonardo AI
First, go to the website and choose the option to sign up with your account.
Step 2: Access the Image Generator
In its home screen, go to the left panel and select Image Generation or Create New Image button on the upper right side.
Step 3: Create the First Image


To generate the first image, go to the prompt box and add a description of the image you want to create. Additionally, you also need to suggest the style of image you want to create. Once done, click on Generate Image and results will appear.
Step 4: Check the Results
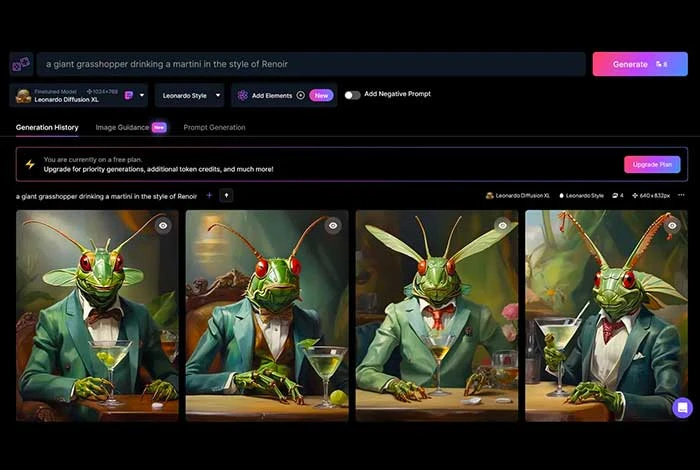
In response, the software would create four different versions of the image that you need to review.
Step 5: Mention a Model or Style
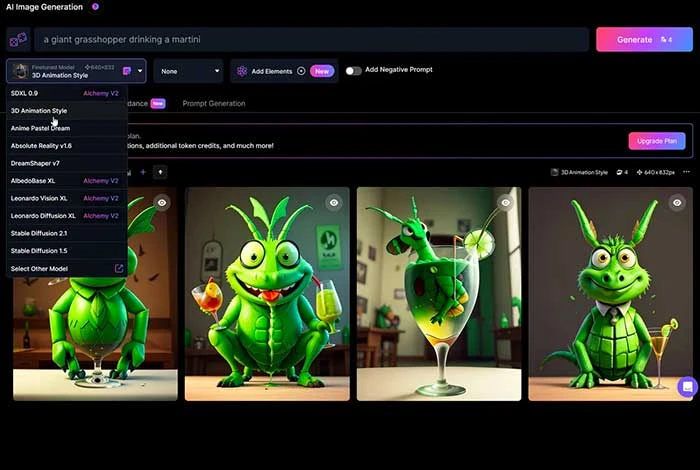
After that, you can choose a specific model. Click on the dropdown menu and select Leonardo Diffusion XL to change software to a different model.
Some of the common model names you can choose are 3D Animation Style and Anime Pastel Dream, DreamShaper v7, Vintage Style Photography, Leonardo Creative, etc. You can experiment with multiple options to see what works for you. Once done, select the option to generate images.
Step 6: Insert Elements
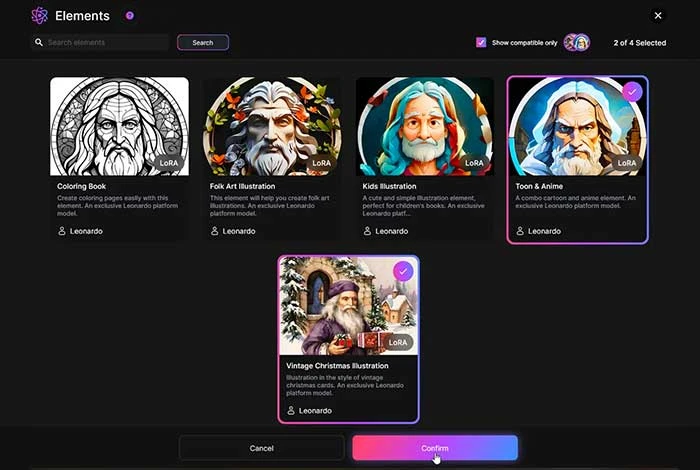
Open the Dropdown Menu and go to the Add Elements section. After that, select a specific element for your image like Folk Art Illustration, Vintage Christmas Illustration, Kids Illustration, etc. You can add more than two elements to generate images.
Step 7: View Pictures with Elements
Once selected, select Confirm to view the last screen. You can also decrease element weightage in the image by moving the slider. Once ready, select Generate to generate the image.
Step 8: Insert a Negative Prompt
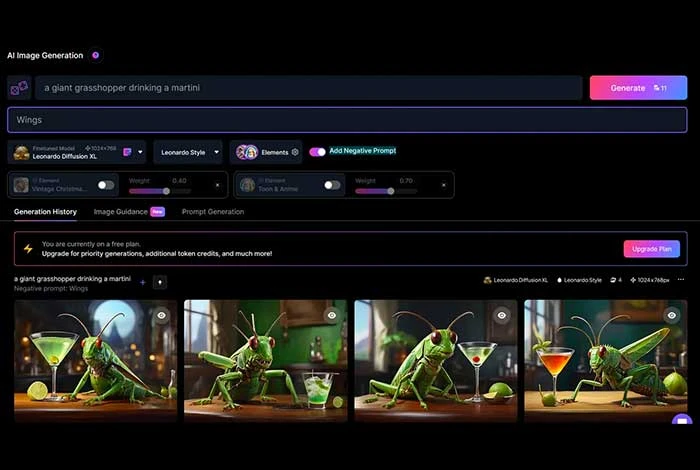
Under this, you can add a negative prompt in which you can specify all the things that you don’t want to show in your images. For example, if you are creating an image of a drinking grasshopper, then you may want it to not have wings.
To configure this action, you can select Add Negative Prompt. In grasshopper example, you can type wings and click on Generate.
Step 9: Specify Images Number
In Leonardo AI, you can also control how many images you want to create in a single result. On the top of the left panel, select Number and add the number of images you want to generate per prompt.
Step 10: Generating Photorealistic Images
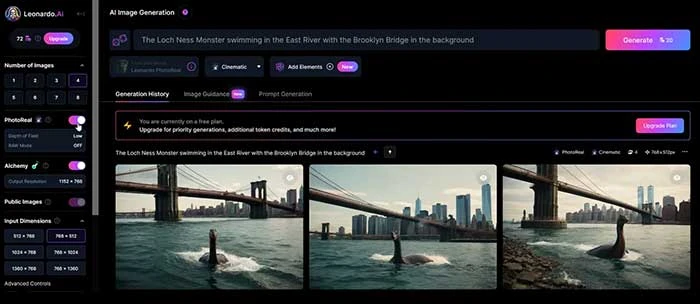
Switch to PhotoReal for generating photorealistic images. You can configure the image’s field depth to High, Medium, and Low. Next, you can also enable RAW mode to generate larger images.
Step 11: Configure the Dimensions
Go to the Input Dimensions and select the dimension numbers you want to apply to the created images. Moreover, you can also change the Aspect Ratio to the Drop-Down Menu. You can further adjust sliders to change the height and width of images.
Step 12: Select and Modify the Desired Image
Once multiple images are generated, select the image you want to use. Once you do that, you will get multiple options to modify the image. For example, you get options to zoom images, remove backgrounds, change their resolution, and a lot more.
Step 13: Copy or Download the Image
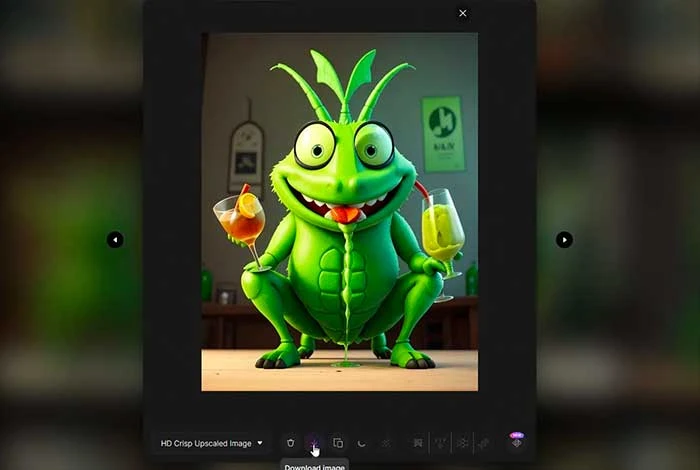
Once you are done with the modifications, you can select the Copy to Clipboard option to copy and paste your generated images. To download the image, select the Download Image button and its copy will be saved on your computer.
Steps to Use Leonardo AI for Image-to-Image Generation
To generate an image directly from an existing image, you need to select the image and adjust its “init” strength by lowering and increasing its values. Once done, add Text Prompts and the image will be generated that you can modify as per your requirements. Let’s look at each step below.
Step 1: Open the Leonardo AI and select Image to Image option.
Step 2: Next select the image source and drag and drop the image into the upload box. You can also select Use for Image to Image to work on generated images.
Step 3: Adjust the image init strength. Lower values imply a more creative image whereas higher value implies preserving more of the original picture’s features.
Step 4: Enter the prompt that best describes the image you want to generate and click on generate image. After that the image will be generated.
How to Use Leonardo.AI Canvas Editor?
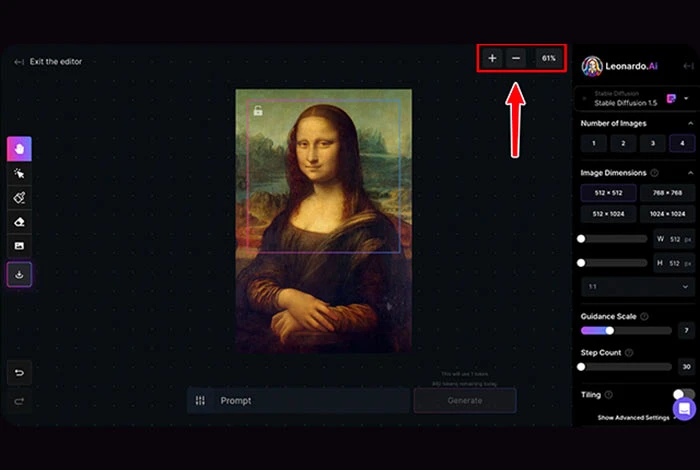
With the help of Leonardo.Ai Canvas editor, you can easily refine and edit your image. All you need to do is upload your image, add elements, and enter a prompt to create the image. After that, you can save and share your image. Here is an easy tutorial that you can use to create images:
Step 1: Upload Image
First upload the image you want to use, once selected the image will appear on the Canvas dashboard.
Step 2: Select and Move Elements
Next, select and move elements in the Canvas via the Select button. Drag the elements from the image and move to the desired location.
Step 3: Pan and Navigate Through Your Image
Use its Pan Tool to explore various parts of the image. Activate the tool and select Drag Across the Canvas to pan and see different sections of the artwork.
Step 4: Draw Masks in the Image
Use the Draw Mask button to paint masks over the specific sections of your image for modifications. Modify the painted areas with colors, shapes, or any other elements.
Step 5: Remove Irrelevant Elements
Remove unnecessary elements from your artwork via the Eraser option. Add more content to the removed space via a text prompt.
Step 6: Generate Image via a Text Prompt
Enter the description of the image you want to generate in the Prompt option. You can also add a negative prompt to tell what not to generate.
Step 7: Save and Download the Artwork
After the image is generated and you are satisfied with it, then you can select Download Artwork option to save it to your computer and share with others.
What Can You Do with Leonardo AI?
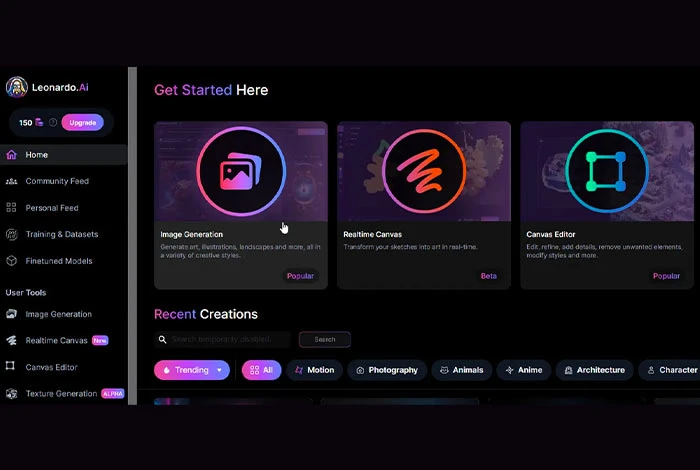
You can use Leonardo AI for generating images powered by AI. However, it also comes with multiple image modification tools to manipulate images. With it, you can perform tasks like in-painting and out-painting.
Moreover, it also provides an eraser tool that you can utilize to remove irrelevant objects from your images without impacting the principal objects of the image. Additionally, it lets you create different types of Prompts to develop images as per your requirement.
Conclusion
Leonardo AI user-friendly designing tool can be used for creating stunning artwork, designs, and images. With this article, you will be able to create any new image and artwork step by step. For more information, you can check out their official website.
FAQs Related to Leonardo AI
What are Leonardo AI uses?
Leonardo AI can be used for multiple purposes such as creating AI-based images, editing existing images, generating creative artwork, and so on.
Can you use Leonardo AI for free?
Yes, you can use Leonardo AI for free. However, for more advanced features, you can upgrade to its paid plan.
How does Leonardo AI work?
Leonardo AI leverages the power of generative adversarial networks (GANs) to generate visually captivating images. GANs consist of two neural networks: a generator and a discriminator. The generator creates new images, while the discriminator evaluates their authenticity.
Can Leonardo AI make 3D models?
Yes, Leonardo AI can be used for creating 3D models and assets.
Are Leonardo AI images private?
When you buy Leonardo AI premium plan, you get a Turn Off option where the generated images will only be visible to you.
Varsha is an experienced content writer at Techjockey. She has been writing since 2021 and has covered several industries in her writing like fashion, technology, automobile, interior design, etc. Over the span of 1 year, she has written 100+ blogs focusing on security, finance, accounts, inventory, human resources,... Read more


