Final Cut Pro is one of the most powerful and versatile video editing software available today. Whether you’re a beginner just starting your journey or a seasoned professional looking to refine your skills, mastering Final Cut Pro can take your video editing to the next level.
In this blog, we’ll walk you through the essential features and functionalities of Final Cut Pro, helping you easily create stunning videos. We’ll cover everything you need to know to get started and excel in using this incredible tool.
Lets dive in!
How to Edit Videos with Final Cut Pro
Lets take a look at all the steps you need to follow while creating and editing videos in Final Cut Pro
1. Create a New Project & Import Media
Final Cut Pro X organizes its content into Libraries, Events, and Projects. A Library is the top-level structure, and typically, you only need one unless you’re working on many unrelated projects. Within Libraries are Events, which can contain video clips, images, songs, and Projects. A Project is where your video is created, storing all your editing decisions.
When you first open Final Cut Pro X, a Library and an Event are automatically created for you, so you only need to create a Project.
- Open Final Cut Pro video editing software. After a few seconds, the main interface will appear.
- In the top menu bar, go to File > New > Project (or press Cmd+N) to create a new project. Enter a name for the project and select Use Automatic Settings.
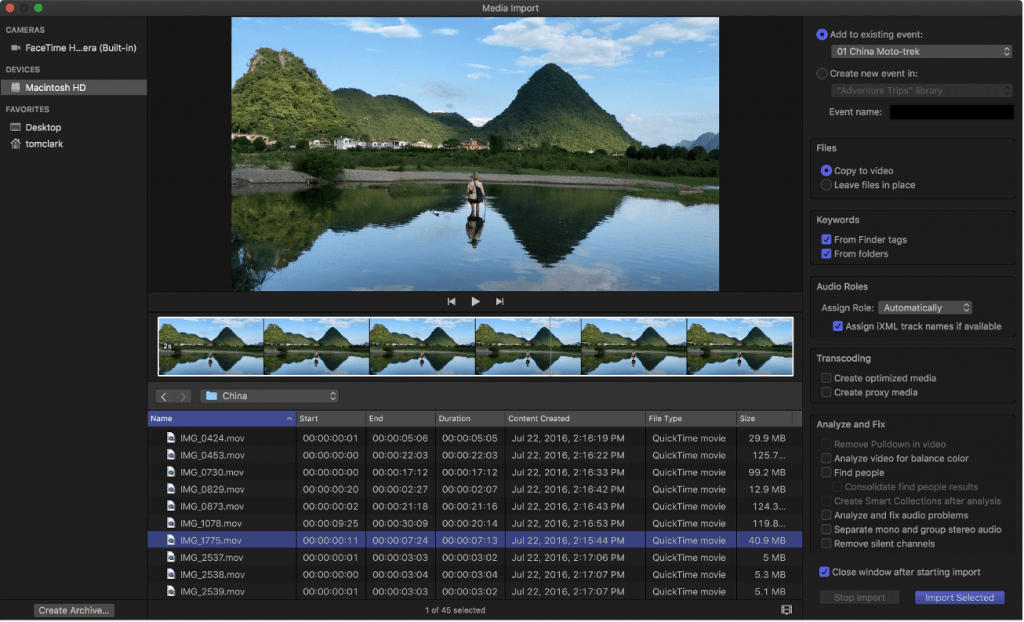
- In the top menu bar, select File > Import > Media (or press Cmd+I) to open the Media Import window.
- Select the audio and video files you want to include in your project and press Import Selected.
- Close the Media Import window.
2. Add Trimmed Clips to Timeline
You will see thumbnails of the imported media in the Browser. To create your video, arrange and trim the media in the timeline, which displays previews and file names for organization.
- In the Browser, set the In and Out points for each clip by holding Option, clicking the thumbnail, and dragging with your mouse. A yellow outline will indicate the selected range to add to the timeline.
- Drag clips from the Browser to the timeline in the desired order, from left to right. Start with an establishing shot to set the scene before the main content.
- To trim clips, move the cursor to the edge of a thumbnail in the timeline until the Trim tool appears. Drag to adjust the clip’s length from either side.
- Rearrange clips in the timeline by dragging and dropping them to new positions. The Magnetic Timeline will automatically insert and arrange them without overlapping.
- Move the play head to the beginning of the timeline and press Play (Space) to preview your video in the Viewer.
3. Add Text & Titles
Final cut pro video editor also offers different Titles in the browser where you have imported the media. You can quickly add them in the video by dragging them into the timeline.
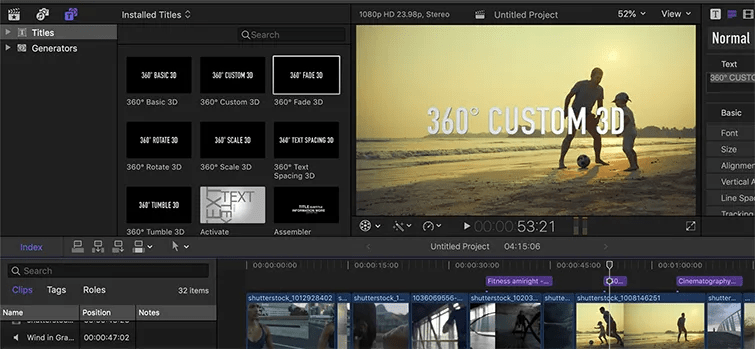
- Over the Browser, select the Titles and Generators sidebar icon for opening it.
- Next, select the Title and drag it into the Timeline.
- Trim the starting and ending of the title just like you did with video clips.
- Move the playhead to preview the title on the screen. You can also adjust the title with the Title Inspector tool.
Final Cut Pro
Starting Price
₹ 29900.00 excl. GST
4. Add Transitions
To add different transitions in your video, you need to follow the following steps:
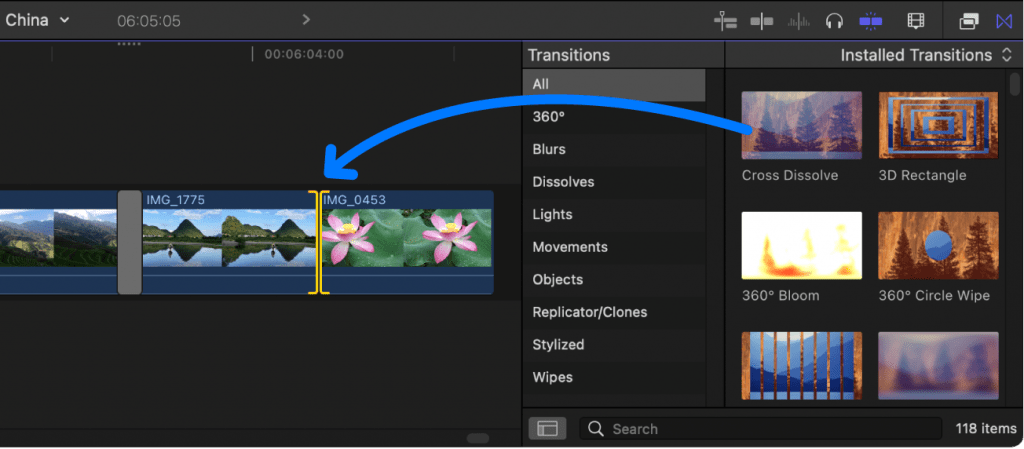
- Go to the Transitions Browser by clicking over the icon else press Ctrl+Cmd+5.
- Select a transition and drag them within 2 clips for the animated transitions in between them.
- You can also adjust the transition’s length by dragging it inwards or outwards.
- For customizing the transition, go to Inspector (Command+4) and adjust the changes.
5. Add Effects
Now that you are done with the title and transitions, its time to add some effects in your video. For that, do the following:
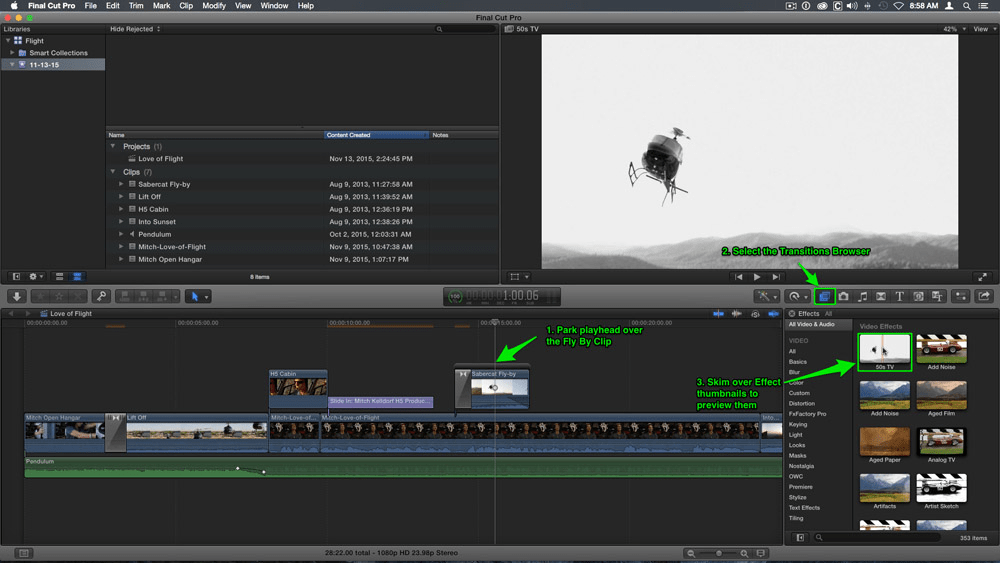
- Select the Effects browser icon and open it or press shortcut Cmd+5.
- Browse different effects and drag the selected effect onto the clip.
- Next, go to the Effects browser icon, select the effect and drag them between the two video clips to create an effect. Go to the Inspector (Cmd+4) to adjust the effect.
6. Add Music & Audio
You can insert your own music track in the videos or with its built-in audio tracks in Final Cut Pro video editor. You can add them free of cost without any need for the license. For that, you need to do the following:
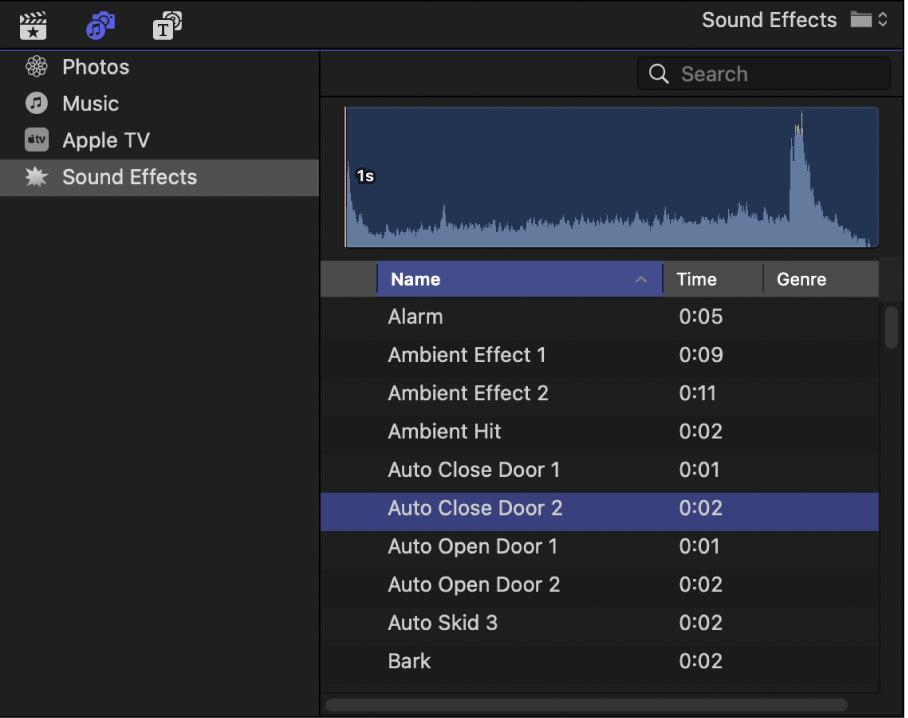
- Select the Photos & Audio sidebar in the browser to open it and choose sound effects.
- Type the song name to see all options, you can also press the play button to preview them.
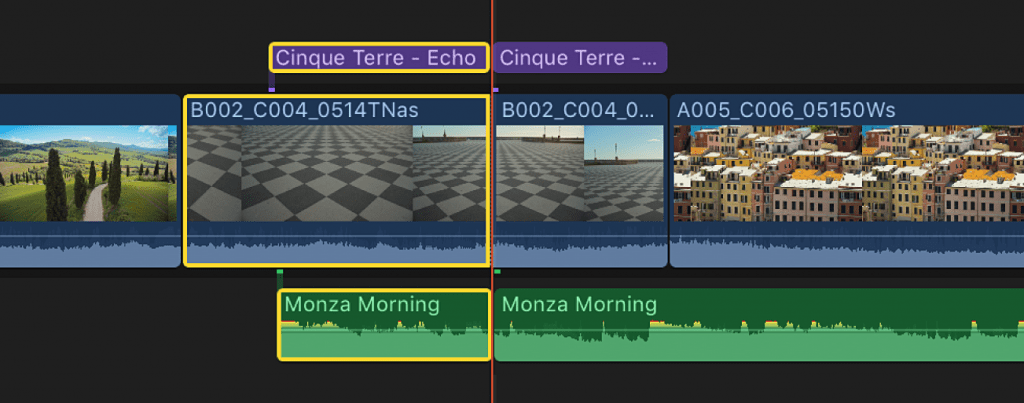
- Once the song is selected, you can drag it to the timeline and you will see the waveform over the green audio track.
- Next, shorten the track’s length as per your requirements.
7. Color Correction
Next, you can use Final Cut Pro Balance Color Tool to adjust colors in your video. This will help you in creating amazing color contrast in your video. Here are the steps you need to follow for this:
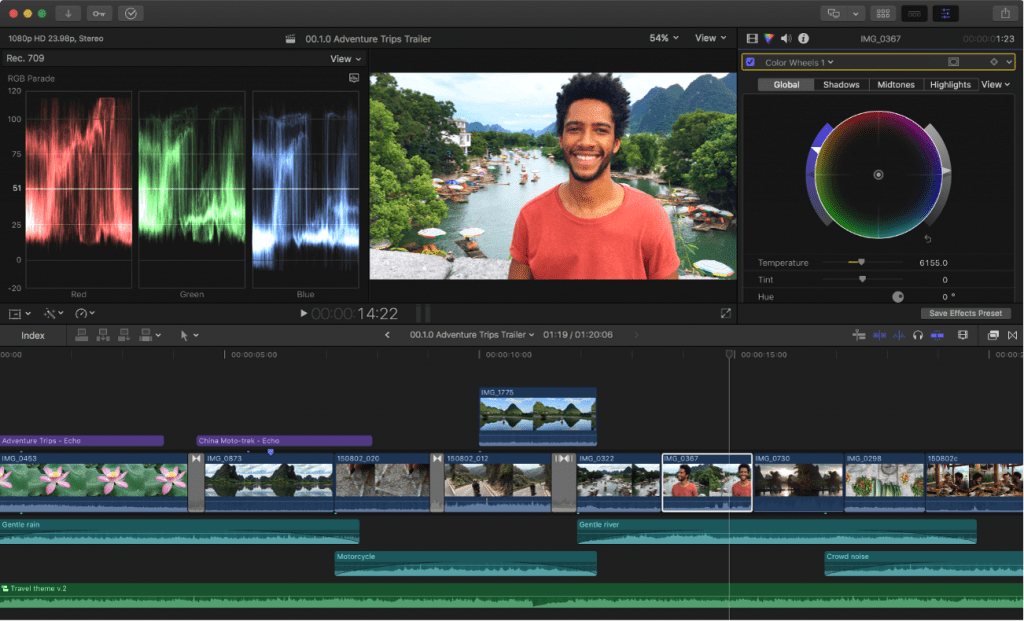
- Select all the video clips in the Timeline, which will be highlighted with a yellow outline.
- Click the Enhancements icon below the Viewer to access the drop-down menu.
- Choose Balance Color, or press Option+Cmd+B.
- This will enhance the colors and contrast of your video clips.
8. Share Your Movie
You’ve finished your first FCPX video! Now that your project is complete, it’s time to share it with the world. Final Cut Pro offers built-in exporting options for sharing directly to YouTube, Facebook, Vimeo, and more, but in this tutorial, you’ll create a high-quality Master File.
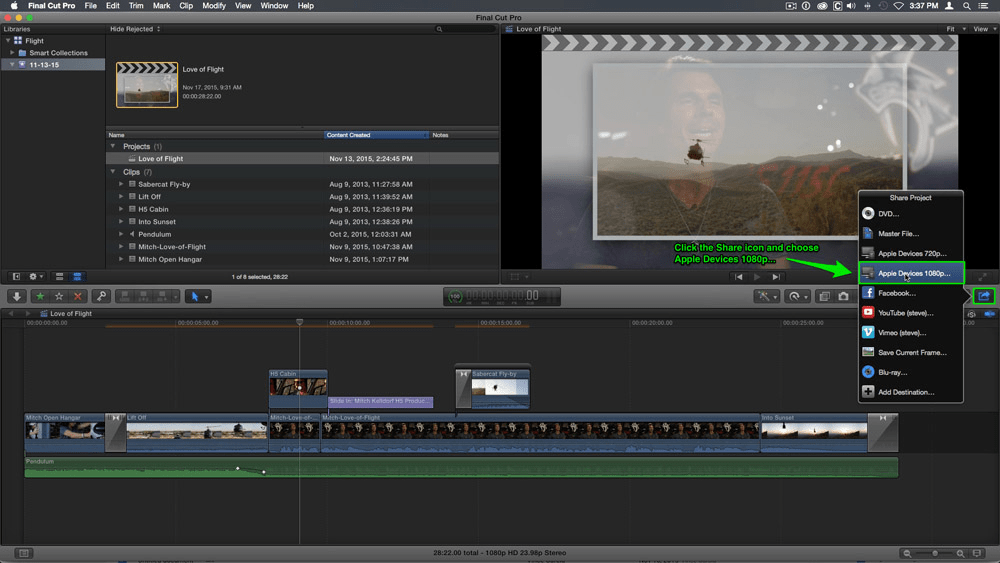
- Click anywhere in the Timeline.
- From the top menu bar, select File > Share > Master File.
- Click Next, and choose a location to save your output video.
- Rendering your final video may take a few minutes. You can check the progress by clicking the Background Tasks icon at the top of the screen.
Conclusion
Mastering Final Cut Pro opens up a world of creative possibilities for your video projects. By familiarizing yourself with its comprehensive set of features, you can transform your raw footage into polished, professional-quality videos. Remember, the key to proficiency is practice and experimentation—don’t be afraid to explore different video editing tools and techniques to find what works best for your style.

Written by
Varsha ![]()
Varsha is an experienced content writer at Techjockey. She has been writing since 2021 and has covered several industries in her writing like fashion, technology, automobile, interior design, etc. Over the span of 1 year, she has written 100+ blogs focusing on security, finance, accounts, inventory, human resources,... Read more