In today’s digital age, creating and sharing videos is easier than ever, thanks to powerful tools like Microsoft Clipchamp. Whether you’re a content creator, a marketer, or just someone who loves making videos, Clipchamp video editing software offers a user-friendly platform with a wide range of features to help you produce high-quality videos with ease.
In this blog, we’ll guide you on how to use Clipchamp, from importing your media to exporting your final masterpiece. Let’s dive in and explore how Clipchamp can elevate your video creation experience.
What is Clipchamp?
Clipchamp video editor is an easy-to-use online video creation platform. It lets you trim, cut, and merge clips, and enhance them with transitions, effects, and filters. With pre-designed templates and a stock library full of videos, images, and audio, you can quickly create stunning content.
The platform also offers tools to add music, voiceovers, sound effects, and captions. Export your videos in various formats and resolutions to suit any platform. Perfect for beginners and non-professionals, Clipchamp video editing software is ideal for personal projects, social media, and marketing videos.
How to Use Clipchamp Video Editor?
If you want to start using Clipchamp then follow the below steps:
Step 1: To start a new video in the Clipchamp video editor, click on the right and open the media file in Windows Explorer.
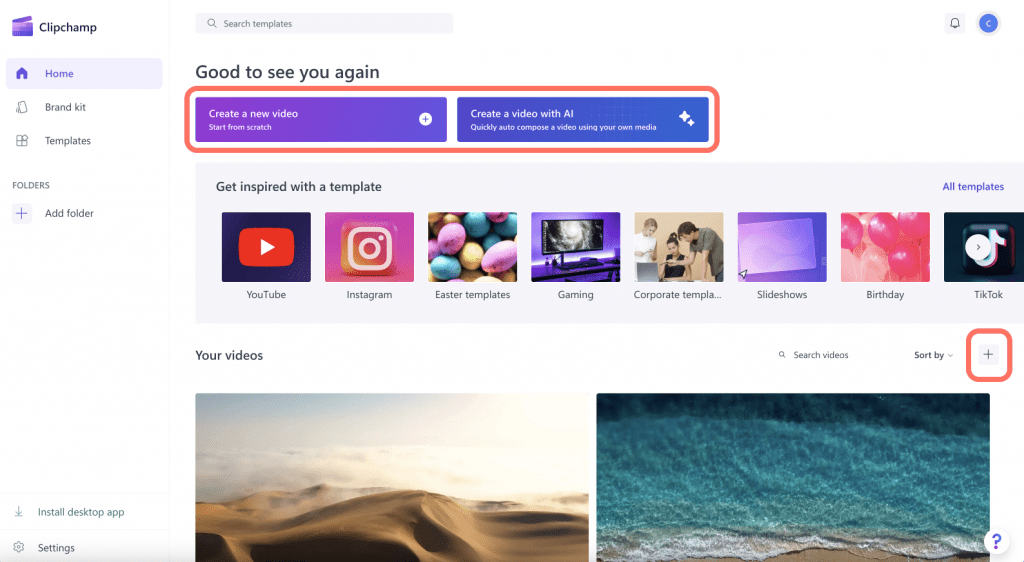
Step 2: Next, you need to click on the edit with Clipchamp button or select Create a video option in the media file within the Windows Photos app. This will open a new video in Clipchamp with the media file existing in the media library.
How to Add Videos to the Timeline in Clipchamp video editor?
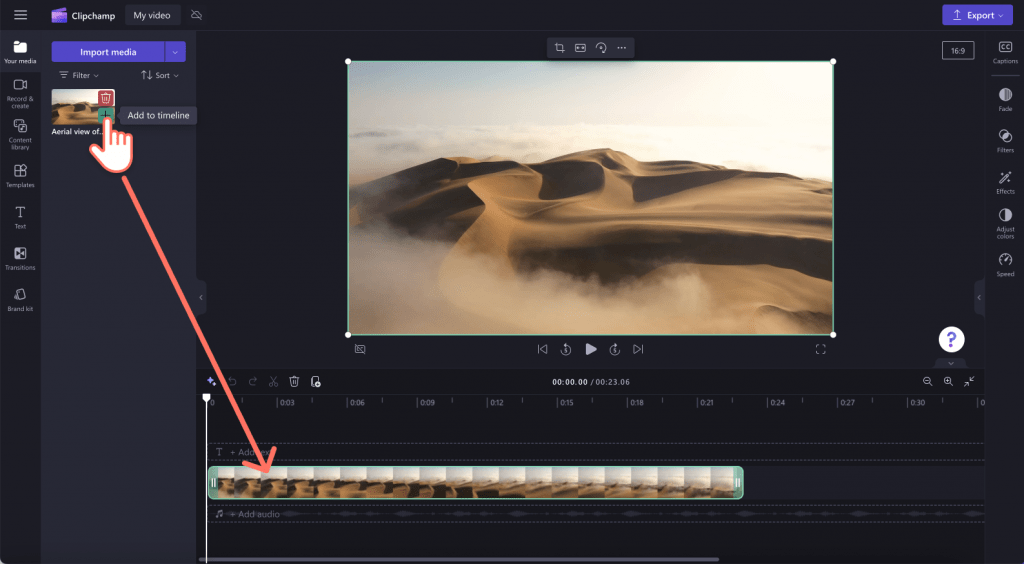
Add your video to the timeline by clicking the Green “+” Button or by dragging and dropping it directly onto the timeline. To add multiple assets, simply repeat the process or highlight all your assets and drag them in together.
Steps to Edit a Video in Clipchamp?
Look at the following steps to edit a video in Clipchamp.
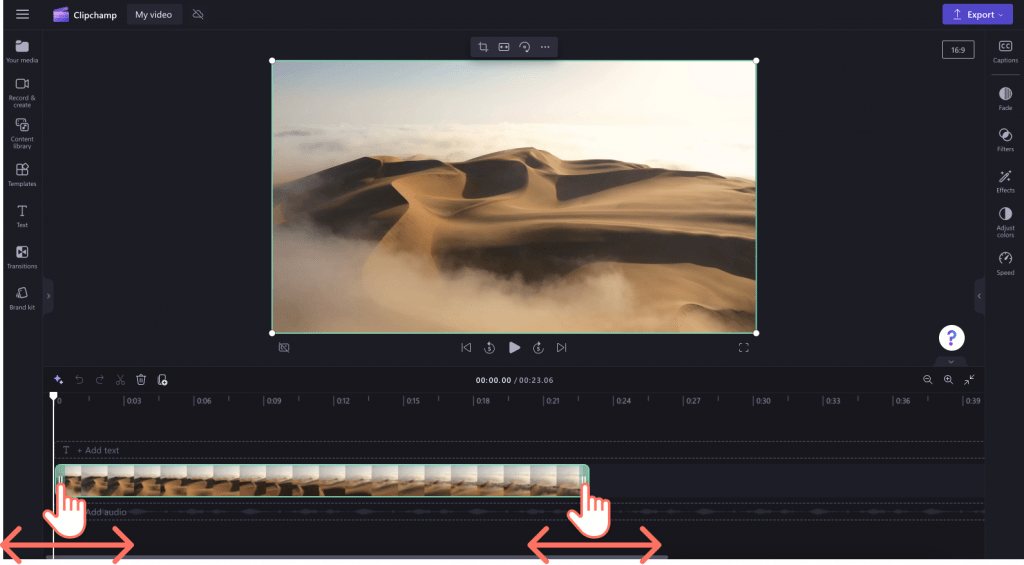
Step 1: For trimming a video, click on the timeline and then open and drag the green bars back and forth.
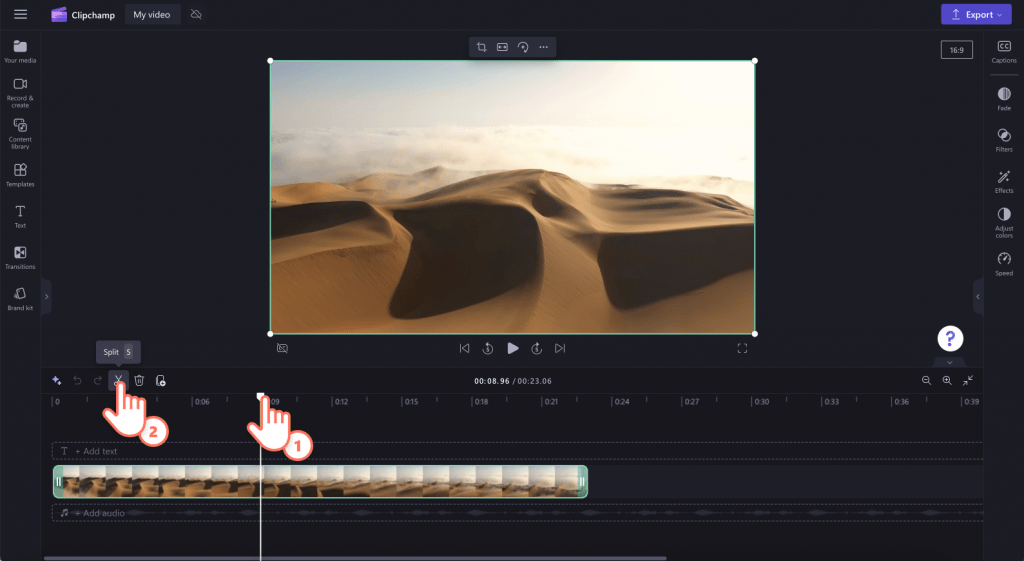
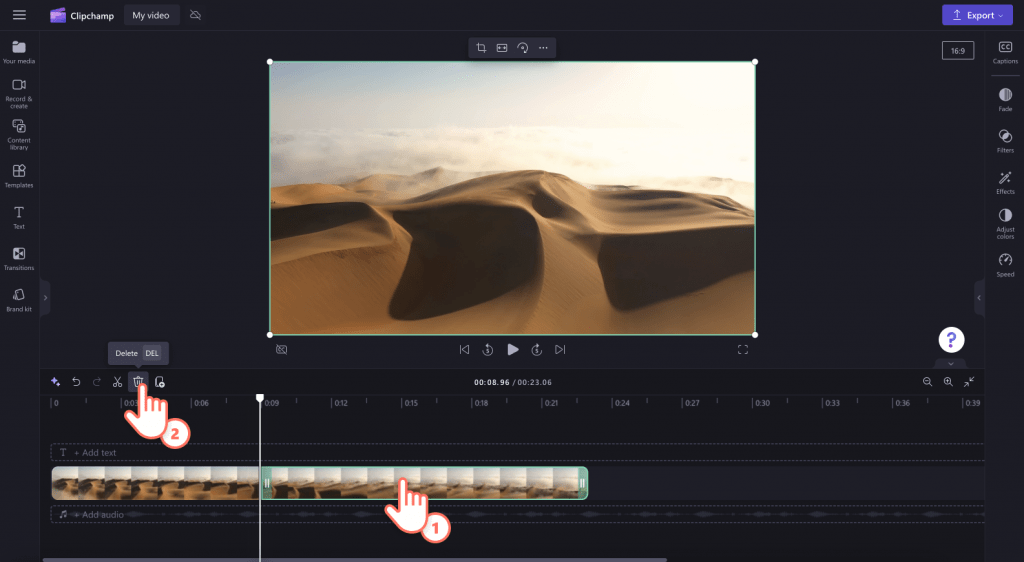
Step 2: For splitting an asset in two parts, click over the clip within the timeline, then move the Seeker (the white vertical line with the circle on the top) so it will be positioned where you need to cut the clip. After that, select the Split Button within the editing toolbar.
Step 3: In case, you want to delete the media from your timeline, click on the asset within your timeline, select the delete button, or else open the delete key on the keyword.
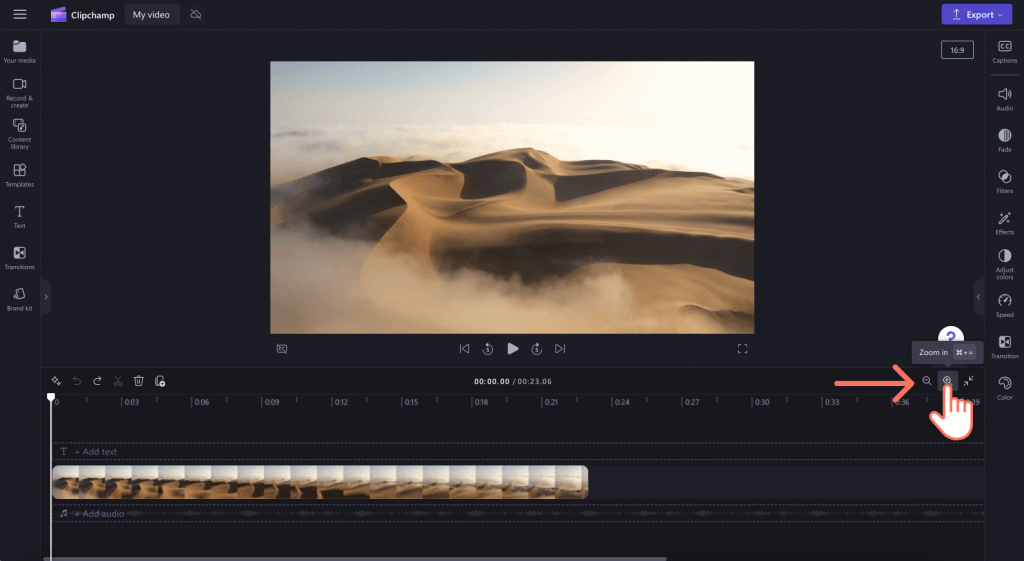
Step 4: To adjust the timeline view, use the zoom buttons in the editing toolbar (+ to zoom in, and – to zoom out). Alternatively, you can click the “Zoom to Fit” button (–><–) to fit the entire timeline within the visible area.
Step 5: To crop, fill, rotate, flip, or create a picture-in-picture effect, utilize the options in the floating toolbar.
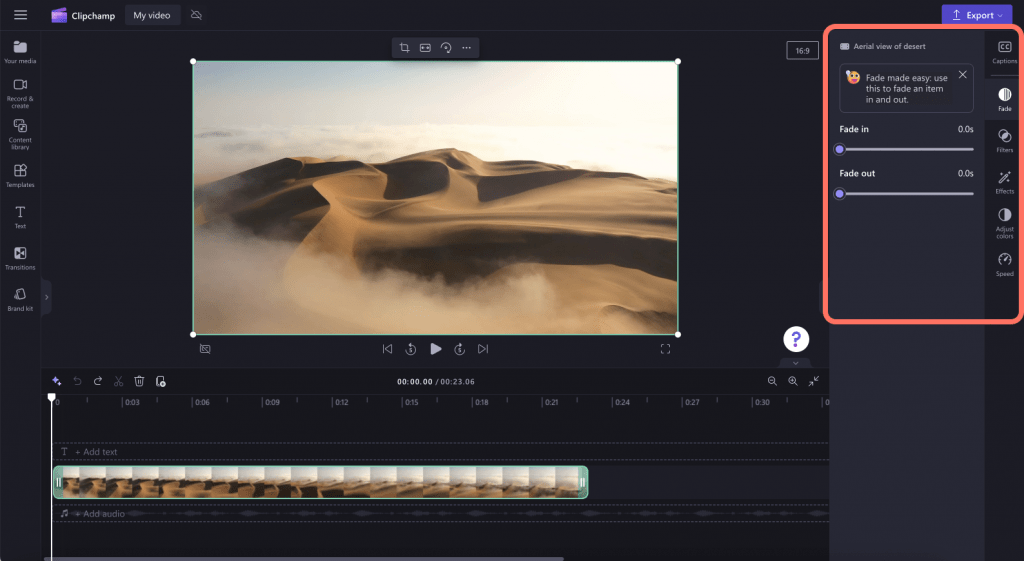
Step 6: For adding fades, filters, effects, colors, etc., you can use the features available on the property panel.
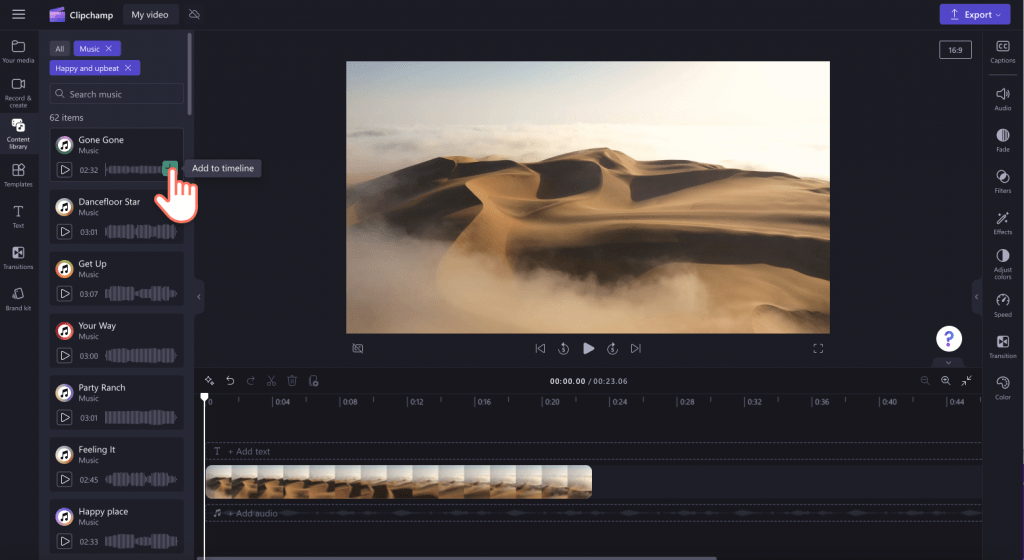
Step 7: For adding stock music in your video, click on Content Library Tab within the toolbar and go to the Audio Category. In this category, you can find different music tracks to your video. Next, drag and drop this music piece in the video timeline or click on the + button.
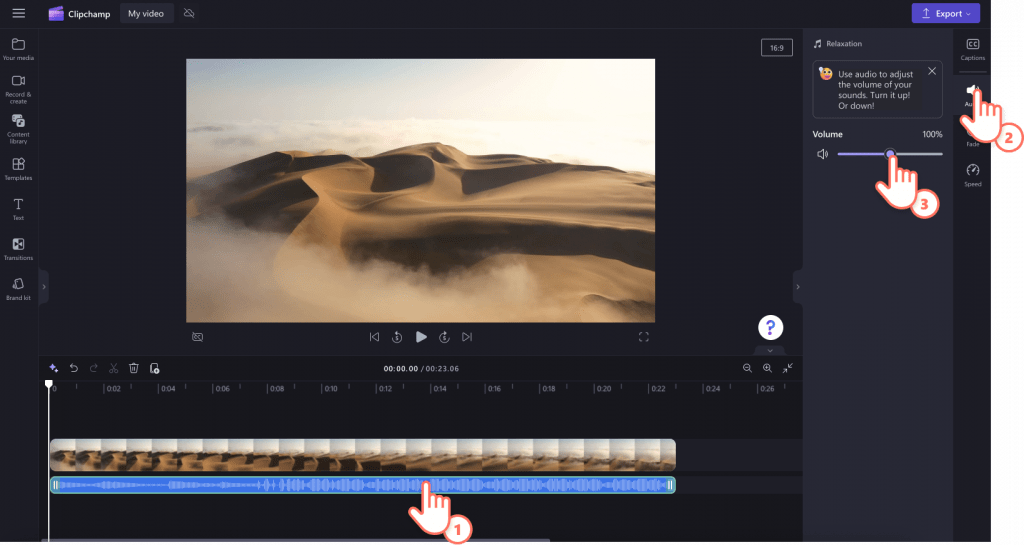
Step 8: If you want to change the audio level of the music, click on the music in your timeline, select the Audio Tab property panel. Next, drag the volume slider to the left to slow down the volume and slide to the right to make the volume louder.
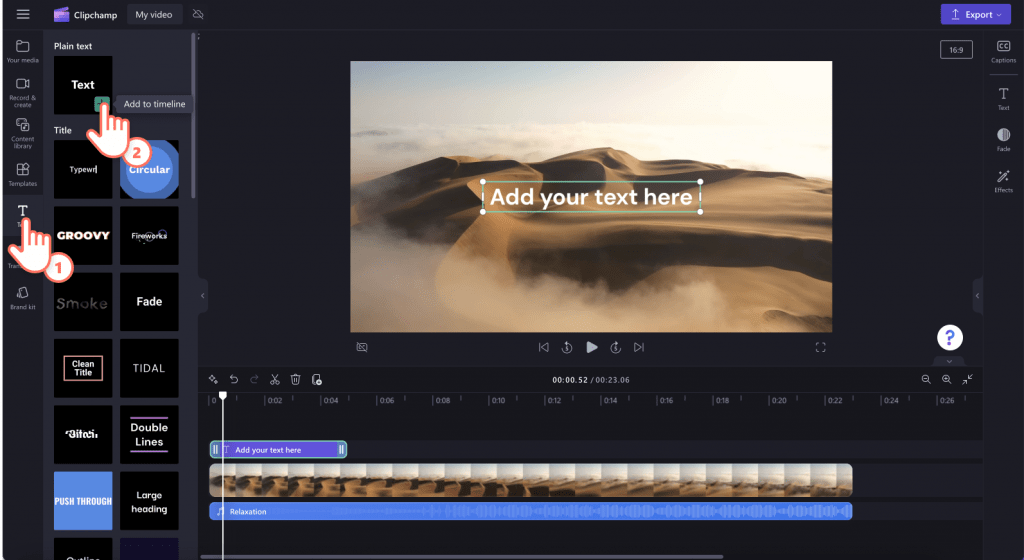
Step 9: For adding a title and text in your video, go to the Text Tab under the toolbar. After that, go through the various text options to find the perfect title for the video. With the drag and drop function, you can easily title to your video timeline in Microsoft Clipchamp.
Step 10: To enhance your project with overlays such as stickers, backgrounds, frames, shapes, annotations, and GIFs, click on the Content Library tab in the toolbar, navigate to the Visuals tab, and select Stickers. From there, you can either drag and drop a sticker onto the timeline or click the + button to add it.

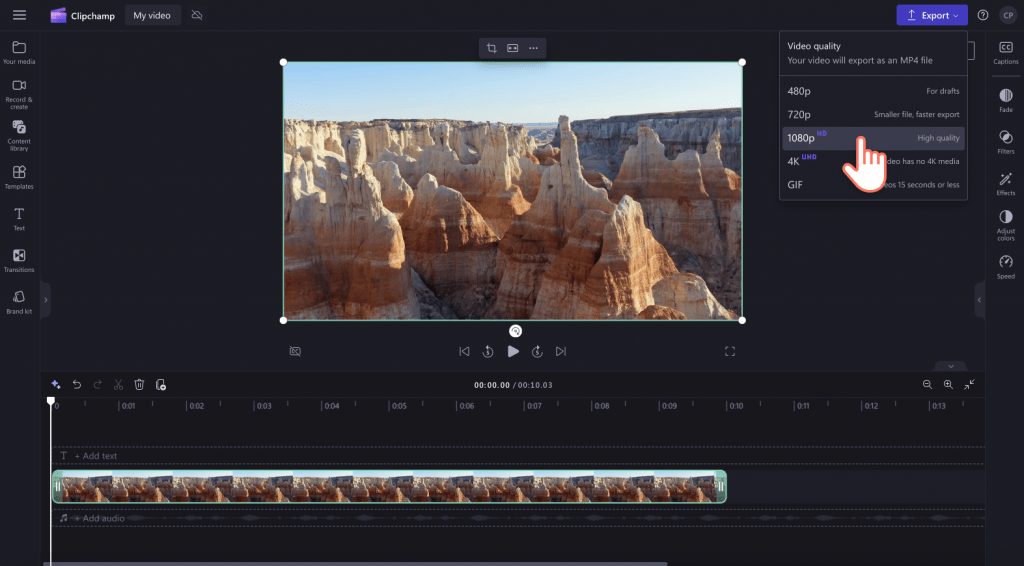
Step 11: To save your video, click the export button located at the top right of the editor. Choose your desired video quality. Note: Premium subscribers can export videos in stunning 4K resolution.
Step 12: If you want to find the home menu, go to the Horizontal Three Lines. Here, you can access the app home, new video, keyboard shortcuts, etc.

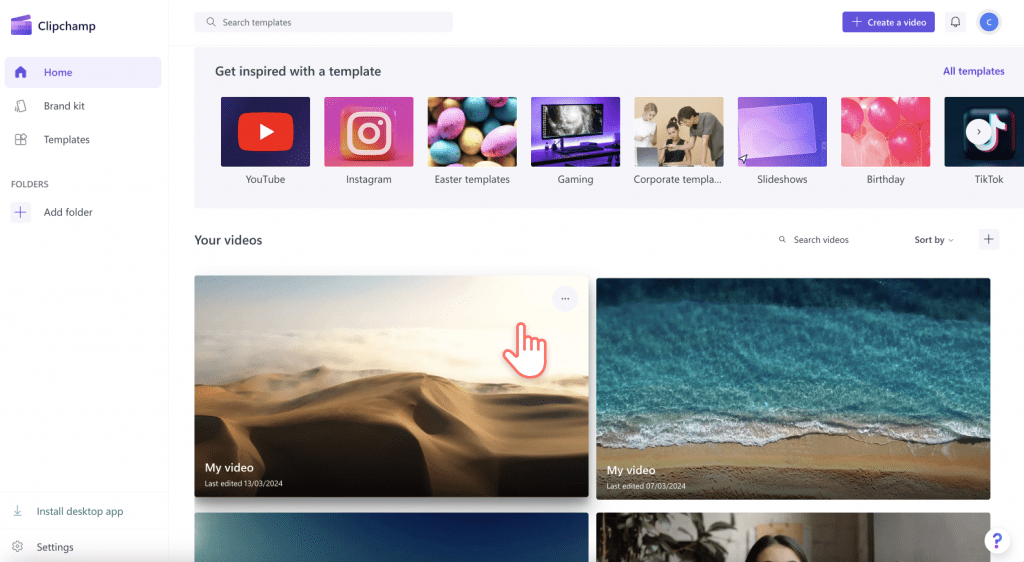
Step 13: To resume watching a video, simply click on it from your homepage. It will pick up right where you left off. Any edits you make to videos are automatically saved as you work, so there’s no need to save them manually before exiting
Start Editing Today!
Clipchamp is a versatile and accessible video editing tool that empowers users of all skill levels to create impressive videos. With its intuitive interface and robust features, you can edit, enhance, and share your videos seamlessly. By following the steps outlined in this guide, you’ll be well on your way to mastering Clipchamp and bringing your creative visions to life. Whether you’re working on a personal project or a professional presentation, Clipchamp video editing software is your go-to solution for all your video editing needs.

Written by
Varsha ![]()
Varsha is an experienced content writer at Techjockey. She has been writing since 2021 and has covered several industries in her writing like fashion, technology, automobile, interior design, etc. Over the span of 1 year, she has written 100+ blogs focusing on security, finance, accounts, inventory, human resources,... Read more